Ball Cake Recipe – Easy, Fun & Delicious Dessert
Ball cake recipe is one of the most delightful desserts I have ever tried. I personally baked this recipe last weekend, and the taste was simply amazing. Its round shape and soft texture make it perfect for kids’ parties and special occasions.
This recipe is not just visually appealing but also very easy to make at home. I loved experimenting with different fillings and coatings, which made it a fun and creative baking experience. If you’re looking for a sweet treat that everyone will love, this ball cake recipe is perfect for you.
History & Origin of Ball Cake Recipe
Ball cake, often called cake pops or spherical cakes, originated as a fun and playful twist on traditional cakes. It became popular in cafes and bakeries for its easy-to-serve format and attractive presentation. Over time, home bakers started experimenting with various flavors, making it a favorite dessert worldwide.
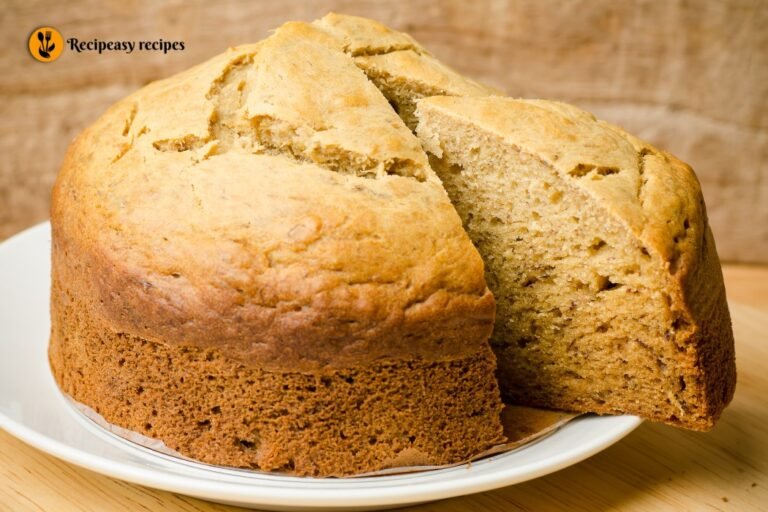
What is Ball Cake?
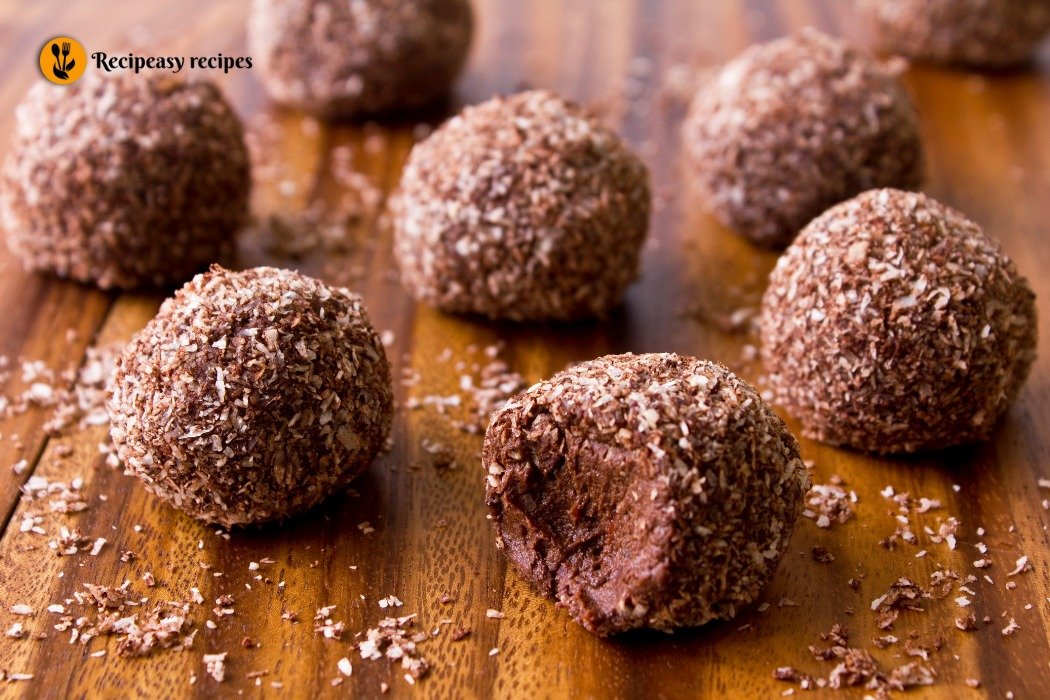
A ball cake is essentially a small, round cake made from crumbled baked cake mixed with frosting or cream, then shaped into balls and coated with chocolate or other toppings. This bite-sized dessert is fun to eat, easy to customize, and ideal for parties or casual snacking.
Why You Will Love Ball Cake Recipe
This simple ball cake recipe is perfect for beginners and seasoned bakers alike. It’s quick, requires minimal equipment, and can be adapted with your favorite flavors and toppings. Kids especially enjoy helping to shape and decorate the cakes, making it a fun family activity.
Equipment You’ll Need
- Mixing bowls: For combining cake crumbs and frosting.
- Electric mixer or hand whisk: To ensure smooth frosting and batter.
- Baking sheet & parchment paper: To bake the cake and shape the balls without sticking.
- Measuring cups & spoons: Accurate measurements ensure the perfect texture.
- Spatula: For mixing and folding ingredients.
- Spoon or cookie scoop: To shape evenly sized balls.
- Microwave or double boiler: To melt chocolate for coating.
- Cooling rack: To let the chocolate set properly.
Ingredients
- 1 pre-baked cake (any flavor: vanilla, chocolate, or strawberry)
- 1/2 cup frosting (buttercream, cream cheese, or ganache)
- 200g chocolate (for coating)
- Sprinkles or chopped nuts (optional, for decoration)
- Wooden sticks (if making cake pops style)
How to Make Ball Cake Recipe (Step-by-Step Guide)
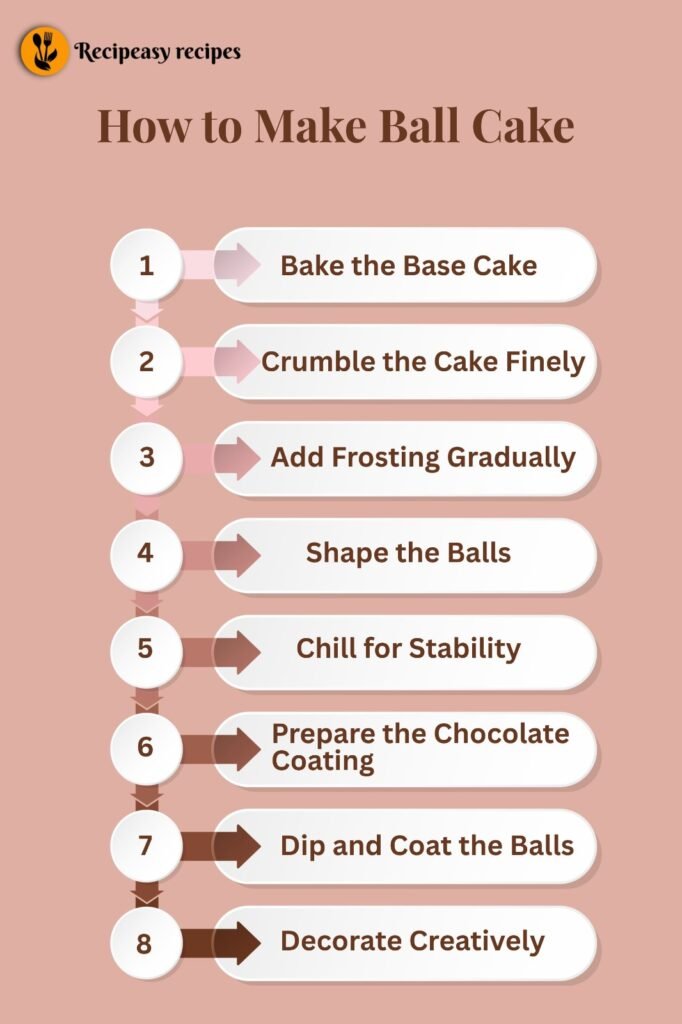
- Bake the Base Cake
Start with your favorite cake flavor vanilla, chocolate, or strawberry. Preheat the oven to the temperature mentioned in your cake recipe. Grease the baking pan and line it with parchment paper to prevent sticking. Pour the batter evenly and bake until a toothpick inserted in the center comes out clean. Let the cake cool completely before proceeding. This ensures the crumbs won’t become mushy when mixed with frosting. - Crumble the Cake Finely
Once cooled, break the cake into small crumbs using your hands or a food processor. The finer the crumbs, the smoother the texture of the ball cake. Avoid leaving large chunks as they may make the balls uneven or fall apart. Take your time to get a uniform crumb consistency for the best result. - Add Frosting Gradually
Transfer the crumbs to a mixing bowl and add frosting gradually. Start with a small amount and mix using a spatula or spoon. The goal is to create a dough-like texture where the crumbs hold together but are not too sticky. Depending on the cake’s moisture, you may need a little more or less frosting. This step is key for shaping smooth, cohesive balls. - Shape the Balls
Scoop small portions of the mixture and roll them between your palms to form smooth, round balls. Try to keep the sizes uniform so that they bake or set evenly. If the mixture sticks to your hands, lightly dust them with powdered sugar or refrigerate the mixture for 10–15 minutes before shaping. - Chill for Stability
Place the shaped balls on a baking sheet lined with parchment paper. Chill in the refrigerator for at least 30 minutes. Chilling firms them up, making it easier to dip in chocolate without breaking or losing shape. This step is crucial, especially if the ambient temperature is warm. - Prepare the Chocolate Coating
Melt chocolate using a microwave or double boiler. If using a microwave, heat in 20-second intervals, stirring in between, until smooth. For a double boiler, keep the chocolate over simmering water, stirring gently to avoid burning. Optional: add a teaspoon of coconut oil or butter to make the chocolate shinier and easier to coat. - Dip and Coat the Balls
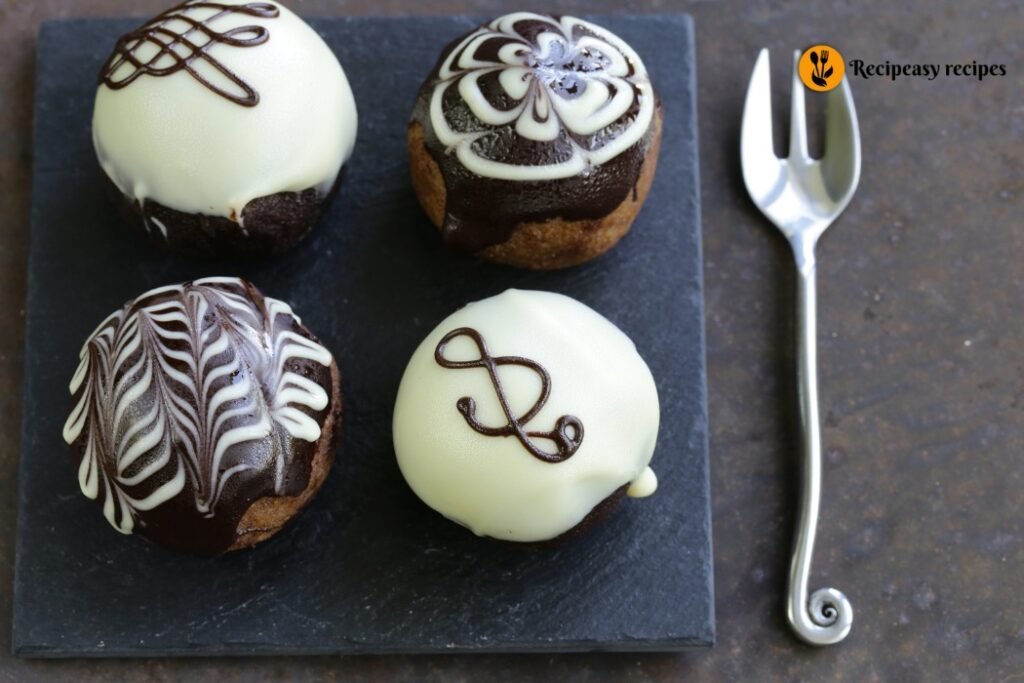
Using a fork or skewer, dip each ball into the melted chocolate. Ensure full coverage and tap off any excess chocolate gently. This creates a smooth, even coating. Place the dipped balls on a cooling rack or parchment paper to set. For thicker coatings, you can dip a second time once the first layer hardens. - Decorate Creatively
While the chocolate is still soft, sprinkle nuts, colored sprinkles, or drizzle a contrasting chocolate for decoration. This not only adds visual appeal but also gives extra texture and flavor. Allow the decorated balls to set completely at room temperature or in the fridge. - Final Touch and Storage
Once set, the ball cakes are ready to serve. If not serving immediately, store them in an airtight container in the refrigerator. Proper storage keeps them fresh for up to 5 days and maintains the chocolate coating’s texture.
Nutrition Information
- Calories: 180–220 per ball (depending on size and ingredients)
- Protein: 3g
- Fat: 10g
- Carbs: 25g
- Sugar: 15g
How to Serve This Recipe
Serve your ball cake as a dessert for parties, family gatherings, or kids’ lunchboxes. You can place them in cupcake liners for a neat presentation or serve them on a decorative platter. Pair with a glass of milk, coffee, or tea for a delightful treat.
FAQs
Q1: Can I use store-bought cake for this recipe?
Yes, you can use any store-bought or leftover cake to make ball cakes.
Q2: How long can I store ball cakes?
Keep them in an airtight container in the refrigerator for up to 5 days.
Q3: Can I make them vegan?
Yes, use a vegan cake and dairy-free chocolate to make a vegan version.
Q4: Can I freeze the ball cakes?
Absolutely, freeze them after shaping but before chocolate coating. Defrost before serving.
Q5: Can I use different coatings?
Yes, try white chocolate, dark chocolate, or colorful candy melts for variety.
Conclusion
The ball cake recipe is a fun, delicious, and visually appealing dessert that anyone can make at home. Its versatility allows for endless creativity, and it’s perfect for parties, kids, or a simple indulgent treat. I personally loved making this recipe and experimenting with different flavors it truly is a unique and enjoyable baking experience.

Ball Cake Recipe – Easy, Fun & Delicious Dessert
Course: Desserts4
servings30
minutes40
minutes300
kcal
One Comment