Beaver Tail Recipe – Classic Canadian Fried Pastry Guide
If you’ve ever traveled across Canada, you’ve probably come across the famous beaver tail recipe a delightful, sweet, fried pastry that looks like a beaver’s tail in shape. I still remember the first time I tried it at a small winter festival in Ottawa. The crispy golden texture, topped with cinnamon sugar and chocolate drizzle, immediately became one of my favorite desserts. It’s a comforting treat that perfectly combines sweetness and warmth ideal for cozy evenings or family gatherings.
What makes this recipe special is its simplicity and flavor balance. Though it looks fancy, the process is easy enough for anyone to try at home. In this article, I’ll share every detail from its origin to ingredients, step-by-step preparation, and even expert tips so by the end, you’ll know exactly how to make it just right.
The Background and Origin of Beaver Tail
The BeaverTail pastry originated in Canada, specifically in Ottawa, during the late 1970s. It was inspired by a traditional family recipe passed down for generations. Its name comes from its shape flat and oval like a real beaver’s tail. Over time, this dessert became a cultural icon, often served at festivals, carnivals, and winter fairs. It represents a blend of Canadian tradition and homemade sweetness that everyone can enjoy.
What Is a Beaver Tail Recipe?
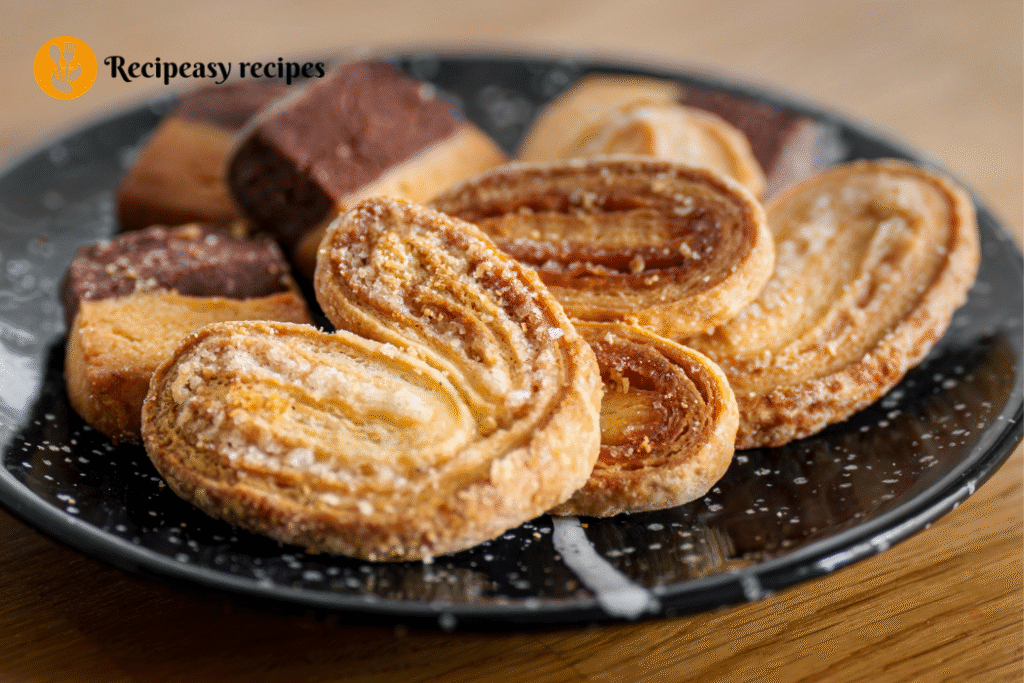
A BeaverTail is a fried dough pastry, usually topped with a variety of sweet ingredients such as cinnamon sugar, Nutella, maple syrup, or fruits. Despite the name, it doesn’t contain any part of an actual beaver! It’s simply shaped like a tail. The dough is soft and chewy on the inside and crispy on the outside a perfect balance of texture. It’s Canada’s answer to the doughnut, but flatter and more customizable.
Why Try This Recipe?
If you love desserts that are crispy outside and fluffy inside, this recipe is worth every minute. It’s simple, affordable, and requires only basic kitchen ingredients. The best part? You can top it with anything from sugar and lemon to chocolate spread or caramel. It’s also a fun recipe to make with kids, and it brings a little taste of Canadian festivity to your kitchen.
Equipment Needed
To make this simple beaver tail recipe, you’ll need the following tools:
- Mixing bowls: For combining and kneading the dough.
- Rolling pin: To flatten the dough into tail-like shapes.
- Deep frying pan or pot: Essential for frying the pastries.
- Tongs or slotted spoon: To safely remove the fried dough from oil.
- Paper towels: To absorb excess oil.
- Measuring cups and spoons: For accurate ingredient proportions.
These tools are all standard kitchen essentials, and each helps maintain the texture and shape of the pastry.
Ingredients of Beaver Tail
Here’s a complete list of ingredients you’ll need to prepare the dough and toppings:
For the Dough
- 2 ¼ cups all-purpose flour
- 2 tbsp sugar
- 1 tsp salt
- 2 tsp instant yeast
- ¾ cup warm milk
- 2 tbsp butter (melted)
- 1 egg
For Frying
- Vegetable oil (for deep frying)
For Topping
- ½ cup sugar
- 1 tbsp cinnamon powder
- Optional: Nutella, maple syrup, chocolate sauce, lemon juice, or fruits
These simple ingredients combine to create that perfect golden crispness and rich, sweet flavor.
Step-by-Step: How to Make a Beaver Tail Recipe
Making a beaver tail at home is easier than it looks you just need the right ingredients, patience, and a little love for cooking! Below is a complete, easy-to-follow process divided into clear subheadings so even a beginner can make this Canadian treat perfectly.
Step 1: Activate the Yeast – The Foundation of Fluffiness
Start by combining warm milk, sugar, and instant yeast in a mixing bowl. Stir it lightly and let it sit for about 5–10 minutes. This process activates the yeast and helps the dough rise beautifully later. You’ll know it’s ready when you see small bubbles or froth on top a sign of happy, active yeast.
Pro tip: Make sure the milk is warm (not hot), around 100°F (38°C). Too hot can kill the yeast, too cold will slow it down.
Step 2: Prepare the Dough – Where the Magic Begins
Once the yeast is ready, add all-purpose flour, salt, melted butter, and one egg into the bowl. Mix everything until it starts coming together. Then, knead the dough gently for 5–7 minutes until it becomes smooth and elastic.
The dough should be soft, not sticky. If it’s too sticky, sprinkle a little more flour; if it’s dry, add a few drops of milk.
Tip: Kneading helps form gluten, which gives the dough its chewy yet tender texture the hallmark of a perfect beaver tail.
Step 3: Let the Dough Rest and Rise
Now, place the kneaded dough in a greased bowl and cover it with a clean kitchen towel. Leave it in a warm spot for about 1 hour or until it doubles in size.
During this time, the yeast works its magic, creating air bubbles that make the dough light and airy.
Pro tip: If your kitchen is cold, place the bowl near a warm oven (turned off) or wrap it in a slightly warm towel.
Step 4: Shape the Beaver Tails
Once your dough has risen, gently punch it down to release excess air. Divide it into 6 equal portions. Take one portion, roll it into a small ball, and then use a rolling pin to flatten it into an oval shape similar to a beaver’s tail!
Each piece should be around ¼ inch thick. Don’t worry about making them perfectly symmetrical a little unevenness adds to their charm.
Step 5: Heat the Oil – Getting Ready to Fry
Pour vegetable oil into a deep frying pan or pot. Heat it on medium flame until it reaches around 350°F (175°C). You can test the temperature by dropping a small piece of dough if it sizzles and rises to the surface, the oil is ready.
Safety tip: Don’t overheat the oil; otherwise, the outer layer will brown too fast while the inside stays undercooked.
Step 6: Fry the Dough to Golden Perfection
Now comes the fun part! Gently slide one piece of dough into the hot oil. Fry for 1–2 minutes per side, turning it with tongs or a slotted spoon. Once both sides turn golden brown, remove the pastry and place it on paper towels to drain the excess oil.
Repeat this process for the remaining dough pieces. You’ll instantly smell that irresistible sweet, buttery aroma filling your kitchen.
Step 7: Add the Toppings – The Sweet Finale
While the fried dough is still warm, it’s time to add the magic touch toppings!
Start by mixing cinnamon powder and sugar in a shallow bowl. Coat each beaver tail generously in this mixture.
You can also add your favorite toppings for extra indulgence:
- Spread Nutella or peanut butter
- Drizzle maple syrup or chocolate sauce
- Add sliced bananas, berries, or whipped cream for a gourmet twist
Be creative there’s no wrong way to enjoy a BeaverTail!
Step 8: Serve and Enjoy the Canadian Classic
Your homemade beaver tails are now ready to serve! Serve them warm for the best texture and flavor. Pair them with a hot drink like coffee, tea, or hot chocolate for a cozy treat that feels straight out of a Canadian winter fair.
Step 9: Optional Twist – Air-Fried or Baked Version
If you prefer a healthier option, you can air fry or bake the beaver tails:
- Air Fryer: Cook at 350°F (175°C) for about 8–10 minutes until golden.
- Oven: Bake at 375°F (190°C) for 12–15 minutes, flipping halfway.
You’ll get a lighter version that’s equally delicious crisp outside and soft inside without deep frying.
Prep Time, Cook Time & Serving Size
- Prep Time: 20 minutes
- Resting Time: 1 hour
- Cook Time: 15 minutes
- Total Time: 1 hour 35 minutes
- Serving Size: 6 pastries
Nutrition Information of Beaver Tail Recipe
| Nutrient | Amount (per serving) |
| Calories | 280 kcal |
| Fat | 10 g |
| Carbohydrates | 42 g |
| Protein | 5 g |
| Sugar | 15 g |
Note: Nutrition values may vary depending on toppings and frying method.
How to Serve This Recipe
Serve BeaverTails warm for the best flavor and texture. You can dust them with powdered sugar, spread Nutella, or drizzle maple syrup on top. They’re perfect with hot chocolate, coffee, or tea — especially on cold days.
Benefits of This Recipe
This dessert might not be diet food, but it brings happiness in every bite! It’s rich in carbohydrates (great for energy) and can be customized with fruits or protein spreads to make it more nutritious. Plus, making it at home allows you to control sugar and oil levels making it a healthier alternative to store-bought pastries.
FAQs
1. What is a beaver’s tail?
A BeaverTail is a flat, fried pastry resembling the shape of a beaver’s tail not an actual animal part!
2. Is beaver tail good to eat?
Yes! It’s sweet, crispy, and soft, often enjoyed as a dessert or street snack in Canada.
3. What’s the best way to cook a BeaverTail?
Deep frying is the most traditional and gives the best texture golden, crispy, and soft inside.
4. Can I make a healthy version of this recipe?
Absolutely! Try baking or air-frying and use whole wheat flour for a healthier twist.
5. How do I store leftover BeaverTails?
Store them in an airtight container for up to 2 days. Reheat in an oven to keep them crispy.
Conclusion
If you’ve never tried making this Canadian classic before, now’s the time! The beaver tail recipe is simple, delicious, and fun to make. With just a few ingredients, you can create a dessert that looks impressive and tastes even better. Whether for family gatherings, festivals, or cozy nights at home, this treat is guaranteed to win hearts.

Beaver Tail Recipe – Classic Canadian Fried Pastry Guide
Course: DessertCuisine: CanadianDifficulty: Easy6 pastries
servings20
minutes15
minutes280 kcal
kcalTry this classic Canadian beaver tail recipe crispy, sweet, and easy to make. Learn its origin, ingredients, step-by-step method, and topping ideas.
Ingredients
For the Dough
2 ¼ cups all-purpose flour
2 tbsp sugar
1 tsp salt
2 tsp instant yeast
¾ cup warm milk
2 tbsp butter (melted)
1 egg
- For Frying
Vegetable oil (for deep frying)
- For Topping
1 tbsp cinnamon powder
½ cup sugar
Optional: Nutella, maple syrup, chocolate sauce, lemon juice, or fruits
Directions
- Step 1: Activate the Yeast – The Foundation of Fluffiness
Start by combining warm milk, sugar, and instant yeast in a mixing bowl. Stir it lightly and let it sit for about 5–10 minutes. This process activates the yeast and helps the dough rise beautifully later. You’ll know it’s ready when you see small bubbles or froth on top a sign of happy, active yeast.
Pro tip: Make sure the milk is warm (not hot), around 100°F (38°C). Too hot can kill the yeast, too cold will slow it down. - Step 2: Prepare the Dough – Where the Magic Begins
Once the yeast is ready, add all-purpose flour, salt, melted butter, and one egg into the bowl. Mix everything until it starts coming together. Then, knead the dough gently for 5–7 minutes until it becomes smooth and elastic.
The dough should be soft, not sticky. If it’s too sticky, sprinkle a little more flour; if it’s dry, add a few drops of milk.
Tip: Kneading helps form gluten, which gives the dough its chewy yet tender texture the hallmark of a perfect beaver tail. - Step 3: Let the Dough Rest and Rise
Now, place the kneaded dough in a greased bowl and cover it with a clean kitchen towel. Leave it in a warm spot for about 1 hour or until it doubles in size.
During this time, the yeast works its magic, creating air bubbles that make the dough light and airy.
Pro tip: If your kitchen is cold, place the bowl near a warm oven (turned off) or wrap it in a slightly warm towel. - Step 4: Shape the Beaver Tails
Once your dough has risen, gently punch it down to release excess air. Divide it into 6 equal portions. Take one portion, roll it into a small ball, and then use a rolling pin to flatten it into an oval shape similar to a beaver’s tail!
Each piece should be around ¼ inch thick. Don’t worry about making them perfectly symmetrical a little unevenness adds to their charm. - Step 5: Heat the Oil – Getting Ready to Fry
Pour vegetable oil into a deep frying pan or pot. Heat it on medium flame until it reaches around 350°F (175°C). You can test the temperature by dropping a small piece of dough if it sizzles and rises to the surface, the oil is ready.
Safety tip: Don’t overheat the oil; otherwise, the outer layer will brown too fast while the inside stays undercooked. - Step 6: Fry the Dough to Golden Perfection
Now comes the fun part! Gently slide one piece of dough into the hot oil. Fry for 1–2 minutes per side, turning it with tongs or a slotted spoon. Once both sides turn golden brown, remove the pastry and place it on paper towels to drain the excess oil.
Repeat this process for the remaining dough pieces. You’ll instantly smell that irresistible sweet, buttery aroma filling your kitchen. - Step 7: Add the Toppings – The Sweet Finale
While the fried dough is still warm, it’s time to add the magic touch toppings!
Start by mixing cinnamon powder and sugar in a shallow bowl. Coat each beaver tail generously in this mixture.
You can also add your favorite toppings for extra indulgence:
Spread Nutella or peanut butter
Drizzle maple syrup or chocolate sauce
Add sliced bananas, berries, or whipped cream for a gourmet twist
Be creative there’s no wrong way to enjoy a BeaverTail! - Step 8: Serve and Enjoy the Canadian Classic
Your homemade beaver tails are now ready to serve! Serve them warm for the best texture and flavor. Pair them with a hot drink like coffee, tea, or hot chocolate for a cozy treat that feels straight out of a Canadian winter fair. - Step 9: Optional Twist – Air-Fried or Baked Version
If you prefer a healthier option, you can air fry or bake the beaver tails:
Air Fryer: Cook at 350°F (175°C) for about 8–10 minutes until golden.
Oven: Bake at 375°F (190°C) for 12–15 minutes, flipping halfway.
You’ll get a lighter version that’s equally delicious crisp outside and soft inside without deep frying.
Notes
- Always use fresh yeast for better dough rise.
- Don’t overcrowd the pan while frying it can lower the oil temperature.
- For a lighter version, try air frying or baking the dough instead of deep frying.
- Experiment with toppings like peanut butter, caramel sauce, or banana slices for a twist.