Crispy, Juicy Chicken Strips That Start with Buttermilk
Some recipes are worth knowing by heart, and this is one of them. The moment you understand what buttermilk does to chicken, you’ll never skip that step again. This chicken strips recipe buttermilk method is the reason certain homemade tenders beat anything you’d pull from a fast food bag and once you try it, the difference is obvious.
The soak is everything. Buttermilk tenderizes the meat from the inside out while adding a subtle tang that makes the coating stick beautifully. What comes out of the pan is crispy on the outside, genuinely juicy in the middle, and seasoned all the way through.
What the Buttermilk Actually Does
It’s worth understanding why this works before you start. Buttermilk is slightly acidic, and that acidity gently breaks down the muscle fibers in the chicken without making it mushy. Meanwhile, the thickness of the buttermilk clings to the surface, giving your coating something real to grip onto.
Basically, you’re setting the chicken up to succeed before it even touches heat. Skipping this step is why a lot of homemade tenders end up dry or bland. Don’t skip it.
Everything You’ll Need
These ingredients are straightforward nothing here requires a specialty store run:
For the soak:
- 1.5 lbs chicken breast tenders (or chicken breasts cut into strips)
- 1 cup buttermilk
- 1 teaspoon hot sauce (optional, but recommended)
- ½ teaspoon garlic powder
- ½ teaspoon salt
For the coating:
- 1 cup all-purpose flour
- ½ cup panko breadcrumbs
- 1 teaspoon smoked paprika
- 1 teaspoon garlic powder
- ½ teaspoon onion powder
- ½ teaspoon black pepper
- ½ teaspoon salt
- Pinch of cayenne (adjust to taste)
For frying:
- Neutral oil like vegetable or canola, enough for about an inch in the pan
That’s your full list. Honestly, this is one of the more simple setups for a recipe that delivers this much flavor.
The Soak — Give It Time
Combine the buttermilk, hot sauce, garlic powder, and salt in a bowl. Add your chicken strips and make sure everything is well coated. Cover the bowl and refrigerate for at least one hour. Two to four hours is even better. Overnight works perfectly if you’re planning ahead.
The longer the chicken soaks, the more tender and flavorful it becomes. This is genuinely one of those cases where patience pays off directly in the final result.
Coating and Cooking
Mix all your dry coating ingredients together in a shallow dish. When you’re ready to cook, take each strip from the buttermilk let the excess drip off but don’t shake it completely dry and press it firmly into the flour mixture. Really press it in, then flip and press again. That two-sided press is what builds a thick, even crust.
Set the coated strips on a wire rack while you heat your oil to around 350°F. Fry in batches, about 3–4 minutes per side, until deeply golden and cooked through. Avoid crowding the pan it drops the oil temperature and makes the coating greasy instead of crisp.
Transfer finished strips back to the wire rack, not paper towels. The rack lets air circulate underneath and keeps that crust from going soft on the bottom.

Want to Bake or Air Fry Instead?
Absolutely valid, and both work well with this same recipe.
For baked tenders, preheat your oven to 425°F. Arrange the coated strips on a wire rack set over a baking sheet. Spray or brush them lightly with oil and bake for 20–22 minutes, flipping once halfway through. They won’t be quite as crunchy as fried, but they’re still really good and a lot easier to clean up after.
For tenders air fryer style, preheat to 400°F. Arrange in a single layer don’t stack them and cook for 10–12 minutes, flipping halfway. Give them a light oil spray before cooking. The air fryer version actually gets impressively crispy and is probably the most convenient option for a weeknight.
A Few Things That Make a Real Difference
Don’t skip letting the coated chicken rest on the rack for 5 minutes before frying. That short rest helps the coating set so it doesn’t fall off in the oil.
Also, season your coating generously. Bland flour coating is the most common reason homemade tenders disappoint. Taste a pinch of your dry mix before you start dredging it should taste well-seasoned on its own.
Finally, resist cutting into a strip to check doneness while it’s still frying. Use a thermometer if you’re unsure 165°F internal temperature is your target. Cutting early lets all the juice escape.
Serving and Storing
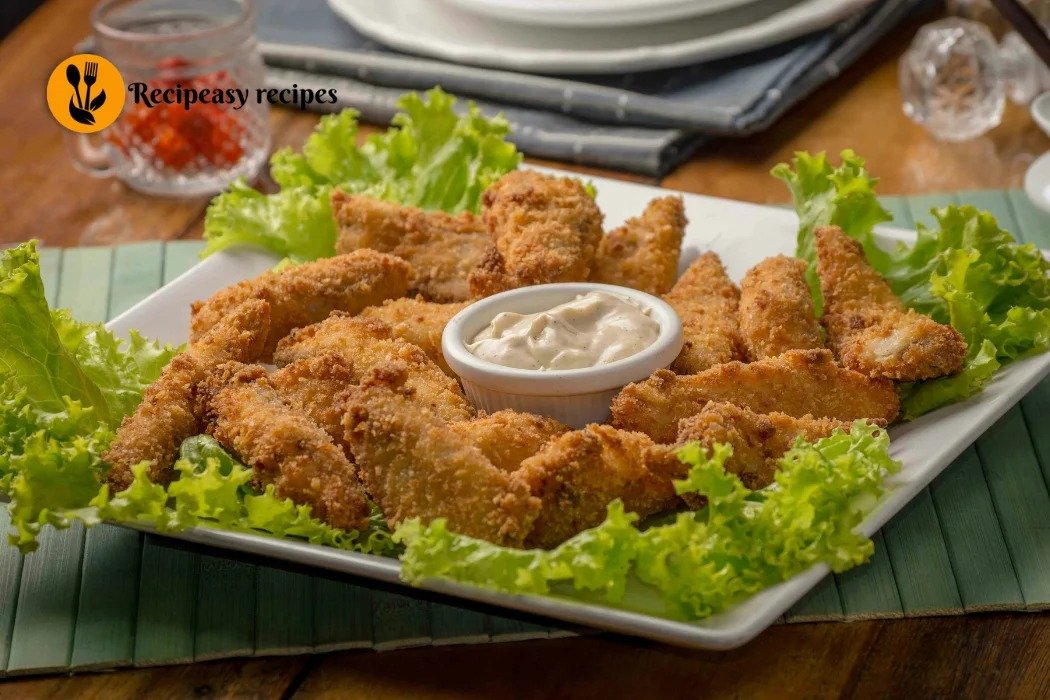
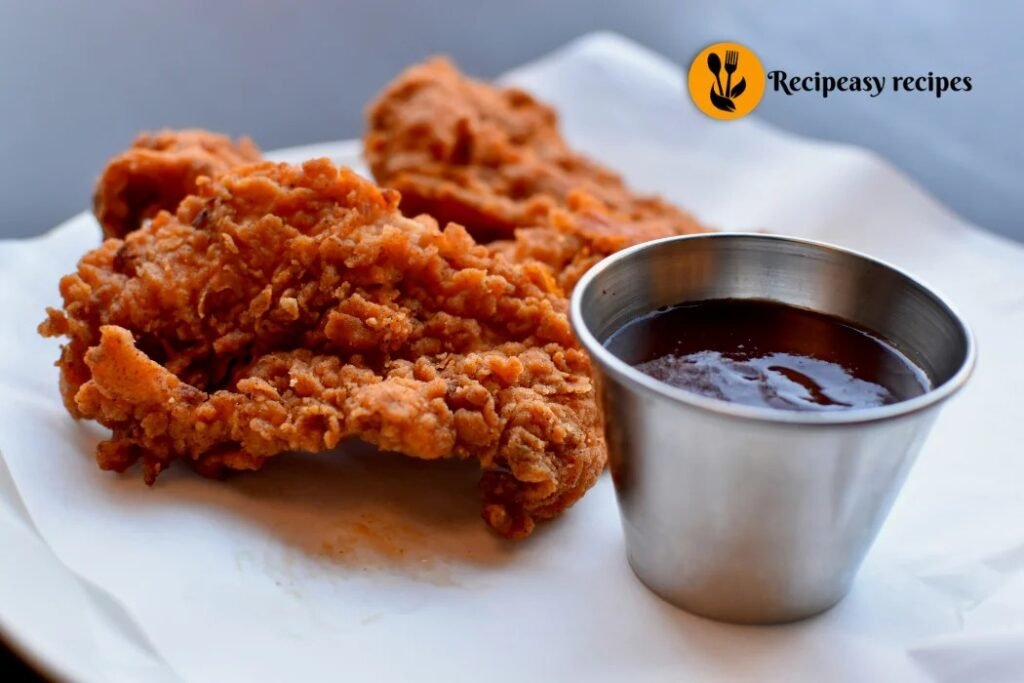
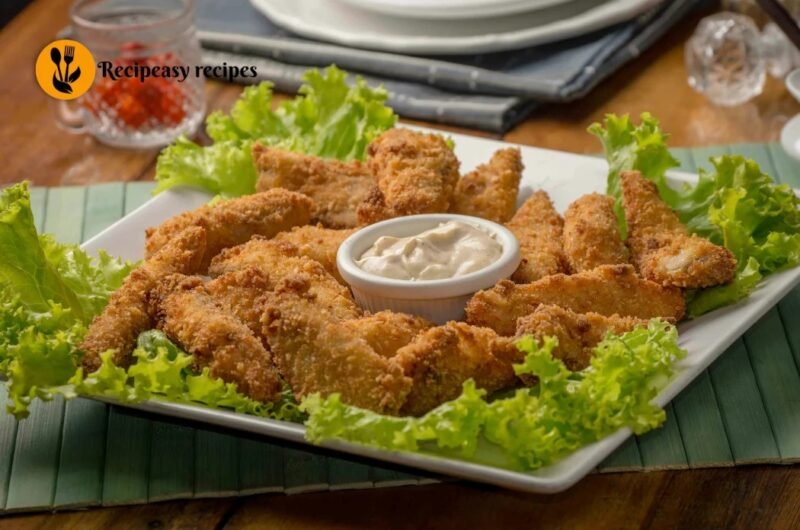
These are best served fresh and hot, straight off the rack. Set out a few dipping sauces honey mustard, ranch, or a spicy mayo and let people help themselves.
Leftovers keep in the fridge for up to 3 days. Reheat them in the oven or air fryer at 375°F for about 6–8 minutes to bring the crunch back. Avoid the microwave if you can it softens the coating and makes the texture a little sad.
For freezing, coat the strips and freeze them raw on a baking sheet before transferring to a bag. Cook straight from frozen in the air fryer or oven, adding a few extra minutes to the cook time.
Worth Making Again and Again
Knowing how to make tenders this way properly soaked, well-seasoned, cooked with a little patience turns a simple dinner into something people genuinely get excited about. This chicken strips recipe buttermilk version is the kind of recipe you’ll stop measuring after the third time because it just becomes part of how you cook.
Make it once on a weekend and you’ll understand exactly what the fuss is about.
Crispy, Juicy Chicken Strips That Start with Buttermilk
Course: Appetizers, SnacksCuisine: AmericanDifficulty: Easy4
servings10
minutes12
minutes400
kcalThis chicken strips recipe buttermilk method creates perfectly crispy, juicy chicken tenders with a flavorful coating. Ideal for frying, baking, or air frying.
Ingredients
For the Buttermilk Soak:
1.5 lbs chicken breast tenders
1 tsp hot sauce (optional)
1 cup buttermilk
½ tsp garlic powder
½ tsp salt
For the Coating:
1 cup all-purpose flour
½ cup panko breadcrumbs
1 tsp smoked paprika
1 tsp garlic powder
½ tsp onion powder
½ tsp black pepper
½ tsp salt
Pinch of cayenne
For Frying:
Vegetable or canola oil
Directions
- Marinate the Chicken
Mix buttermilk, hot sauce, garlic powder, and salt. Add chicken and coat well. Cover and refrigerate for at least 1 hour (up to overnight). - Prepare Coating
In a shallow dish, combine flour, panko, and all seasonings. - Coat the Chicken
Remove chicken from buttermilk. Let excess drip off, then press firmly into coating mixture on both sides. - Rest Before Cooking
Place coated strips on a wire rack and let rest for 5 minutes. - Fry the Chicken
Heat oil to 350°F (175°C). Fry strips for 3–4 minutes per side until golden and cooked through. - Drain Properly
Transfer to a wire rack (not paper towels) to keep them crispy.
Notes
- Internal temperature should reach 165°F (75°C)
- Season coating well for best flavor
- Don’t overcrowd the pan