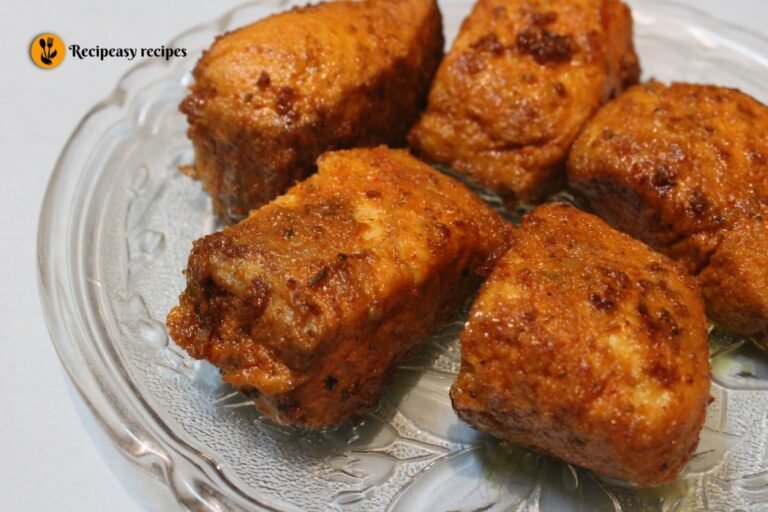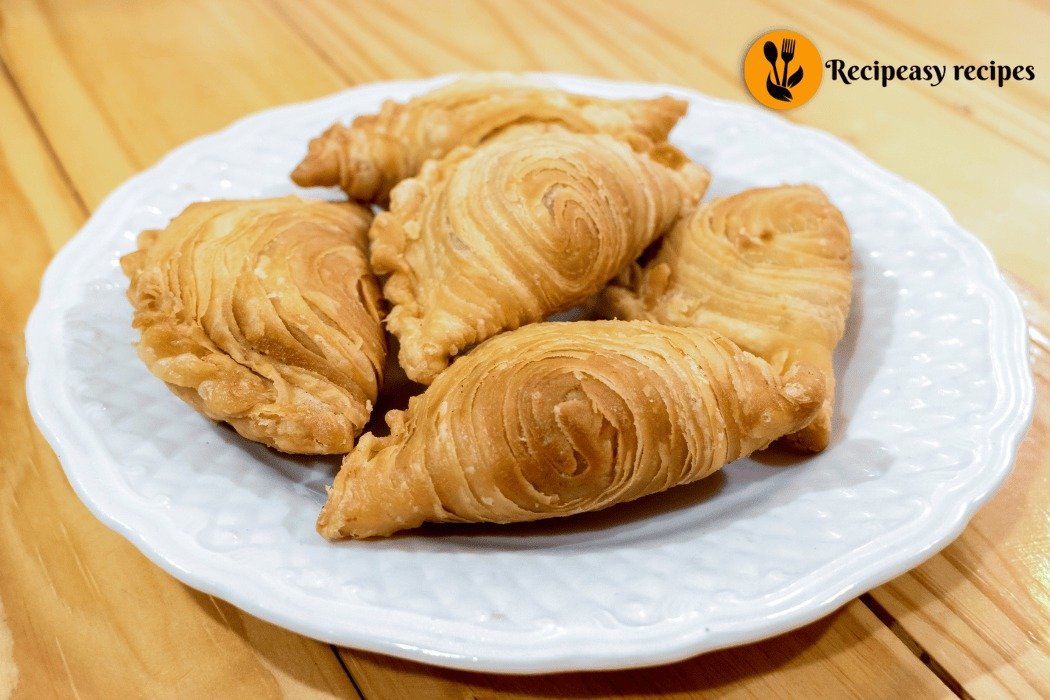
Chicken Puff Recipe: Crispy, Flaky, and Ridiculously Good
If you’ve ever grabbed a savory pastry from a bakery and thought “I wish I could make this at home,” you’re in the right place. This Chicken puff recipe delivers all those crispy, flaky layers wrapped around a perfectly seasoned chicken filling, and it’s honestly easier than you’d think.
I started making these years ago for family gatherings, and now they’re the thing everyone requests. They look impressive enough for parties but simple enough to throw together on a weeknight when you want something more exciting than the usual dinner routine.
The best part? You can make them ahead, freeze them, and bake fresh whenever the craving hits.
Why These Chicken Puffs Always Turn Out Great
The secret is using store-bought puff pastry. Yes, you could make your own from scratch, but honestly, why would you? The frozen stuff is what professional bakers use, and it saves you hours of work.
Puff pastry loves high heat, which creates those signature crispy layers. Combined with a well-seasoned filling that’s not too wet, you get pastries that are golden on the outside and flavorful on the inside every single time.
These also work hot or at room temperature, which makes them perfect for lunch boxes, picnics, potlucks, or just keeping in the fridge for quick snacks throughout the week.
What You’ll Need
The ingredient list is refreshingly straightforward. Here’s what goes into making about 12 chicken puffs:
For the filling:
- 2 cups cooked chicken, finely diced or shredded
- 1 medium onion, finely chopped
- 2 cloves garlic, minced
- 1 small potato, boiled and mashed (optional but adds creaminess)
- 2 tablespoons butter
- 2 tablespoons all-purpose flour
- 1/2 cup milk
- 1/2 teaspoon black pepper
- 1/2 teaspoon paprika
- 1/4 teaspoon chili flakes (optional)
- Salt to taste
- 2 tablespoons fresh cilantro or parsley, chopped
For assembly:
- 2 sheets frozen puff pastry, thawed
- 1 egg, beaten (for egg wash)
- Sesame seeds or nigella seeds (optional, for topping)
That’s everything. No weird ingredients, no specialty items you’ll use once and never again.
Making the Filling
This is where all the flavor happens, so don’t rush it. Heat the butter in a pan over medium heat and add the chopped onions. Cook them until they’re soft and starting to turn golden about 5-6 minutes. This caramelizes them slightly and adds sweetness to the filling.
Add the minced garlic and cook for another minute until fragrant. Garlic burns easily, so keep stirring.
Sprinkle in the flour and stir it around for about a minute. This creates a roux that’ll thicken your filling and prevent it from being too runny inside the pastry.
Slowly pour in the milk while stirring constantly. The mixture will thicken into a creamy sauce. If it seems too thick, add a splash more milk. If it’s too thin, let it simmer for another minute.
Stir in your cooked chicken, mashed potato if using, black pepper, paprika, chili flakes, and salt. Mix everything well and let it cook for 2-3 minutes so the flavors meld together. Taste and adjust seasoning this is your chance to make it perfect.
Remove from heat and stir in the fresh herbs. Let the filling cool completely before using it. This is important hot filling will melt the pastry and make it impossible to work with.
Working with Puff Pastry
Thaw your puff pastry according to the package directions, usually overnight in the fridge or 30-40 minutes at room temperature. Don’t microwave it that makes it soggy and weird.
Once thawed, roll each sheet out slightly on a lightly floured surface. You want it about 1/8 inch thick. This makes the pastry a bit larger and easier to work with.
Cut each sheet into 6 squares (or rectangles, depending on how you rolled it). You’ll end up with 12 pieces total.
Keep the pastry cold while you work. If your kitchen is warm or the pastry starts feeling sticky, pop it back in the fridge for 10 minutes. Cold pastry puffs better in the oven.
Shaping Your Chicken Puffs
Place about 2 tablespoons of filling in the center of each pastry square. Don’t overfill it’s tempting, but too much filling means they’ll burst open while baking.
You have a few options for shaping:
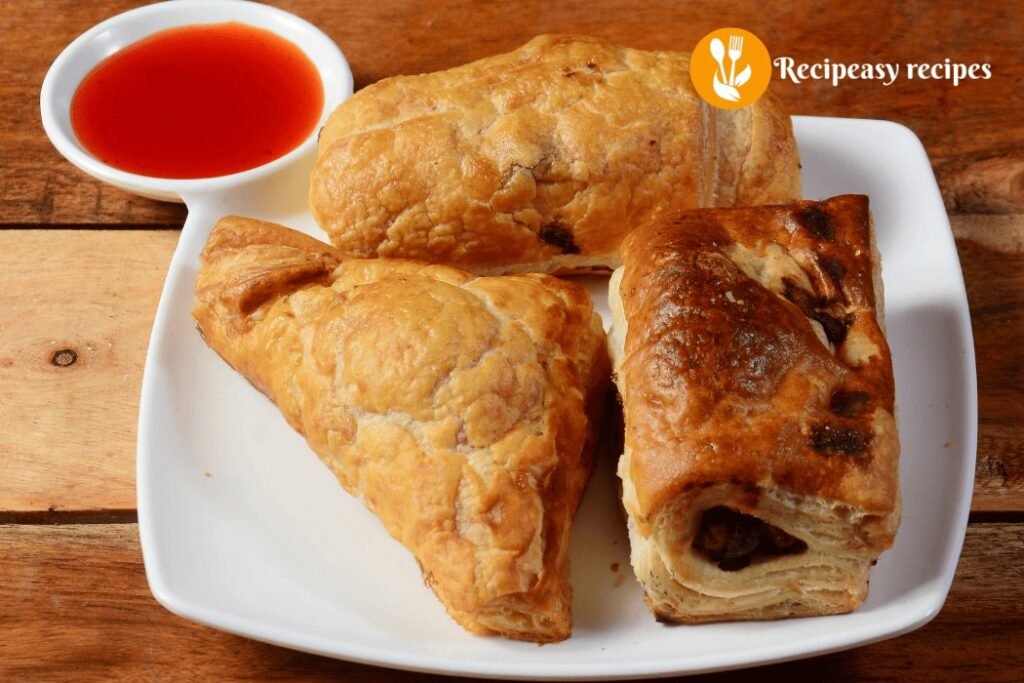
Triangle puffs: Fold the square diagonally to create a triangle. Press the edges firmly to seal, then crimp with a fork for extra security.
Rectangle puffs: Fold the square in half to create a rectangle. Seal the three open edges well.
Envelope style: Fold all four corners toward the center, overlapping slightly, and press to seal.
Whatever shape you choose, make sure those edges are sealed tight. Use a little water on your finger to help the pastry stick if needed.
Getting That Perfect Golden Finish
This is where the egg wash comes in. Beat one egg with a tablespoon of water and brush it over the top of each puff. This gives you that beautiful golden, glossy finish that makes them look bakery-quality.
If you’re using sesame seeds or nigella seeds, sprinkle them on now. They stick to the egg wash and add a nice visual and textural element.
Use a sharp knife to cut 2-3 small slits in the top of each puff. This lets steam escape and prevents them from getting soggy inside.
Arrange the puffs on a baking sheet lined with parchment paper, leaving some space between them. They’ll puff up in the oven and you don’t want them sticking together.
Baking to Perfection
Preheat your oven to 400°F (200°C). This high heat is essential for getting that dramatic puff and crispy texture.
Bake for 20-25 minutes until the pastries are deeply golden brown and puffed up beautifully. Every oven is different, so start checking at the 18-minute mark.
They should feel light when you pick one up. If they feel heavy, they need more time. The bottoms should be golden too lift one up to check.
Let them cool on the baking sheet for 5 minutes before transferring to a wire rack. They’re incredibly hot inside, so resist the urge to bite into one immediately (I’ve learned this the hard way).
Making It Creamier
For a richer, creamier chicken puff filling, there are a few tweaks worth trying.
Add a couple tablespoons of cream cheese to the filling mixture while it’s still warm. It melts right in and creates an incredibly lush texture.
You can also replace the milk with heavy cream or half-and-half. The extra fat makes the filling taste more indulgent.
Some people like adding a tablespoon of mayonnaise to the cooled filling for creaminess and a subtle tang. It sounds odd but works surprisingly well.
Flavor Variations That Work
Once you’ve mastered the basic version, experimenting is half the fun.
Spicy version: Add more chili flakes, diced jalapeños, or a spoonful of sriracha to the filling. These are fantastic if you like heat.
Cheesy puffs: Stir in 1/2 cup of shredded cheddar, mozzarella, or pepper jack into the filling. The cheese melts and creates pockets of gooey goodness.
Mushroom and chicken: Sauté chopped mushrooms with the onions. They add an earthy flavor and extra moisture.
Curry-spiced: Add a teaspoon of curry powder to the filling for a different flavor profile entirely. These are popular in many South Asian bakeries.
Bacon chicken: Mix in some cooked, crumbled bacon with the chicken. Because bacon makes everything better.
Using Leftover or Rotisserie Chicken
This is honestly the best use for leftover chicken. Rotisserie chicken from the grocery store works perfectly just shred or dice the meat and you’re halfway done.
Leftover grilled chicken, roasted chicken, or even boiled chicken all work. The filling is flavorful enough that even plain cooked chicken tastes great.
If you’re starting from scratch, poaching chicken breasts in seasoned water takes about 15 minutes and gives you perfectly tender meat for this recipe.
You can even use canned chicken in a pinch. Drain it well, flake it with a fork, and proceed with the recipe. It won’t be quite as good as fresh, but it works when you need something quick.
Make-Ahead and Freezer Instructions
This is where chicken puffs really shine. You can prep them completely, arrange on a baking sheet, and freeze until solid. Once frozen, transfer to a freezer bag or container.
Frozen puffs keep for up to 3 months. When you want to bake them, go straight from freezer to oven no thawing needed. Just add 5-7 minutes to the baking time.
You can also freeze the filling separately. Make a big batch, portion it into containers, and freeze. Thaw overnight in the fridge when you’re ready to use it.
Already-baked puffs keep in the fridge for 3-4 days. Reheat them in a 350°F oven for 8-10 minutes to crisp them back up. The microwave makes them soggy, so avoid it if you can.
Common Issues and How to Fix Them
Pastry didn’t puff: Usually means the pastry got too warm before baking or the oven wasn’t hot enough. Keep everything cold and make sure your oven is fully preheated.
Filling leaked out: You either overfilled them or didn’t seal the edges properly. Use less filling and really press those edges together. A fork crimp helps a lot.
Soggy bottoms: The filling was too wet. Make sure your filling is thick and not soupy, and always let it cool completely before using.
Burnt tops but raw inside: Your oven might be running hot. Try reducing the temperature to 375°F and baking a bit longer. You can also tent the tops with foil if they’re browning too quickly.
Uneven browning: Rotate the baking sheet halfway through baking. Most ovens have hot spots that cause uneven cooking.
What to Serve Alongside
Dipping sauces elevate these from good to amazing. Sweet chili sauce is my favorite the sweetness and heat play beautifully against the savory filling.
Mint chutney or cilantro chutney are traditional accompaniments that add brightness and freshness. You can buy them at Indian grocery stores or make your own.
Ketchup works too, especially for kids. Sometimes simple is best.
For a more substantial meal, serve them with a cucumber salad dressed in vinegar, a tangy coleslaw, or some pickled vegetables. The acidity cuts through the richness of the pastry.
Why This Recipe Works
Chicken puff recipe work so well because the rich, well-seasoned chicken filling pairs perfectly with buttery, flaky puff pastry. Even if the shapes aren’t perfect or the pastry doesn’t puff evenly, they still taste amazing.
These recipes use forgiving ingredients and easy techniques, making them reliable every time. Whether for parties, meal prep, or quick snacks, these golden chicken puffs always deliver great flavor with minimal effort.
Chicken Puff Recipe: Crispy, Flaky, and Ridiculously Good
Course: MainCuisine: International / European-inspiredDifficulty: Easy12
servings15
minutes25
minutes350
kcalIngredients
2 cups cooked chicken, finely diced or shredded
1 medium onion, finely chopped
2 cloves garlic, minced
1 small potato, boiled and mashed
2 tablespoons butter
2 tablespoons all-purpose flour
1/2 cup milk
1/2 teaspoon black pepper
1/2 teaspoon paprika
1/4 teaspoon chili flakes
Salt to taste
2 tablespoons fresh cilantro or parsley, chopped
Directions
- This is where all the flavor happens, so don’t rush it. Heat the butter in a pan over medium heat and add the chopped onions. Cook them until they’re soft and starting to turn golden about 5-6 minutes. This caramelizes them slightly and adds sweetness to the filling.
- Add the minced garlic and cook for another minute until fragrant. Garlic burns easily, so keep stirring.
- Sprinkle in the flour and stir it around for about a minute. This creates a roux that’ll thicken your filling and prevent it from being too runny inside the pastry.
- Slowly pour in the milk while stirring constantly. The mixture will thicken into a creamy sauce. If it seems too thick, add a splash more milk. If it’s too thin, let it simmer for another minute.
- Stir in your cooked chicken, mashed potato if using, black pepper, paprika, chili flakes, and salt. Mix everything well and let it cook for 2-3 minutes so the flavors meld together. Taste and adjust seasoning this is your chance to make it perfect.
- Remove from heat and stir in the fresh herbs. Let the filling cool completely before using it. This is important hot filling will melt the pastry and make it impossible to work with.
Notes
- Keep pastry cold for maximum puff.
- Don’t overfill to avoid leakage.
- Can freeze assembled puffs and bake from frozen.