Atayef Recipe: Soft & Sweet Middle Eastern Dessert
One of the most well-liked and traditional desserts in the Middle East is atayef. While its flavor is so unique that people love it all year round, this tasty snack is especially special during the holy month of Ramadan. Atayef’s creamy or nutty filling, sweet syrup, and soft pancake-like texture make every bite memorable. Sweetness, softness, and richness are all perfectly balanced. I enjoy tasting traditional meals from various cultures.
I have more attachment to desserts that have emotional and historical importance. I fell in love with Atayef’s warmth and gentleness the moment I had it for the first time. Since then, I have made it multiple times at home, adding my own unique touch and maintaining the traditional flavor. I’ll describe how I make Atayef Recipe in my kitchen today. Let’s explore it:
Why It’s Popular
Atayef is well-liked because it represents tradition, special occasions, and family get-togethers in addition to being a dessert. After a long day of fasting, people are waiting for Ramadan simply to receive this. It is unique among desserts due to its half-moon shape and fillings. It is pleasant due to the thick filling, sugar syrup, and soft dough.
Every country has a dessert that tastes like home, and atayef is that dessert for a lot of people. They prepare it with their loved ones, serve it to visitors, and enjoy it during the celebrations. It has taken over world cultures since it is made with basic ingredients and has an unbelievable flavor.
Ingredients for Atayef Recipe
Because the ingredients are simple and easily available, I always smile when I cook Atayef. Each ingredient plays a unique part in achieving the ideal texture and flavor. The final result is amazing and fulfilling when everything comes together.
Here are the basic Atayef ingredients you need to make the pancakes at home:
- All-purpose flour
- Fine semolina
- Sugar
- Salt
- Baking powder
- Instant yeast
- Water
- Milk
- Vanilla extract
For cooking, you will also need a non-stick pan or griddle. For fillings, you can choose what your family likes. In my house, we usually make both walnut and cheese filling.
Equipment Needed for Atayef Recipe
When I made Atayef for the first time, I thought it would need special tools, but I was wrong. You only need a mixing bowl, a whisk, a non-stick pan, and a spoon. If you plan to fry Atayef, you will need a frying pan and oil. For baking, an oven tray works well. Simple kitchen tools are enough to prepare this lovely dessert without stress.
How to Make Traditional Atayef Recipe with Cheese or Nuts at Home: Step-by-Step Guide
Making Atayef is a calm and enjoyable process. I always feel relaxed while preparing it. Each step is simple, and the result is always rewarding.
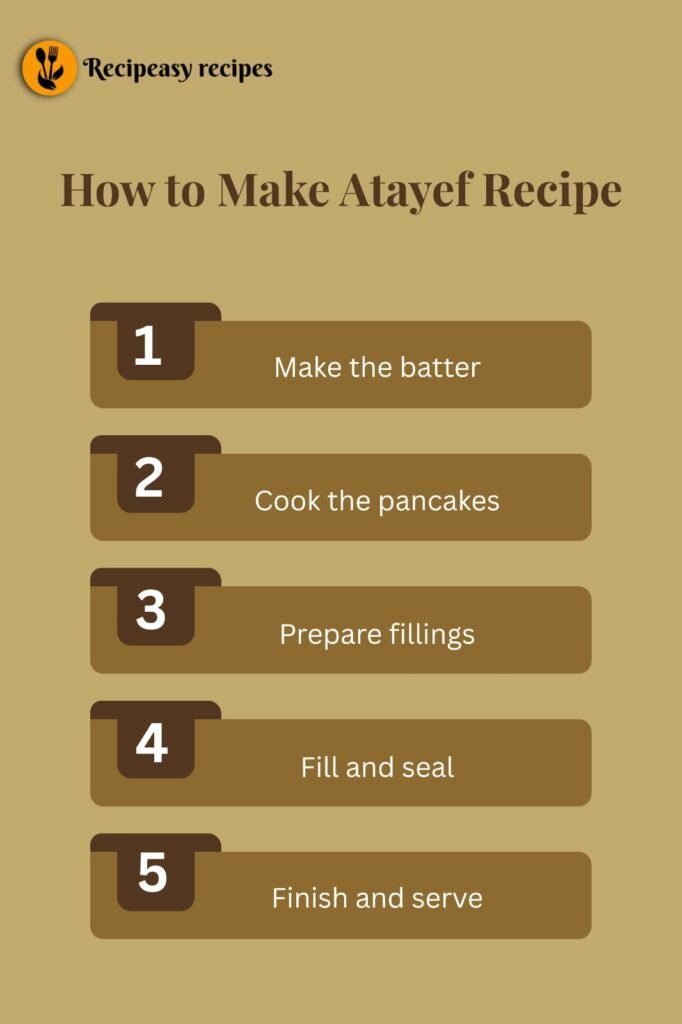
Step 1: Prepare the Batter: In a bowl, I start by mixing flour, semolina, sugar, yeast, baking powder, and salt. After that, I whisk in some warm water to make sure there are no chunks. After making sure it is thick and smooth, I should let it sit for approximately half an hour until air bubbles start to form on the surface.
Step 2: Cook the Atayef Pancakes: I put a nonstick pan on medium heat without adding any oil. I then cover the pan with small pieces of dough. One side of the pancakes is fried. I take them out once the surface has dried and it is full of bubbles. Until the batter becomes exhausted, this process is repeated.
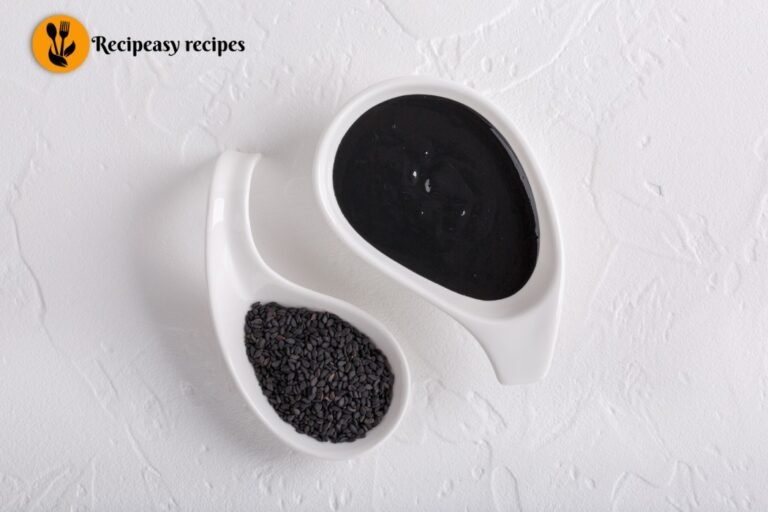
Step 3: Prepare the Filling: I continue to prepare the filling in the meantime. I grind walnuts or pistachios and add sugar and cinnamon for the nut filling. I make sure the cream/cheese filling is smooth and has a fresh flavor. Fillings shouldn’t be overly wet.
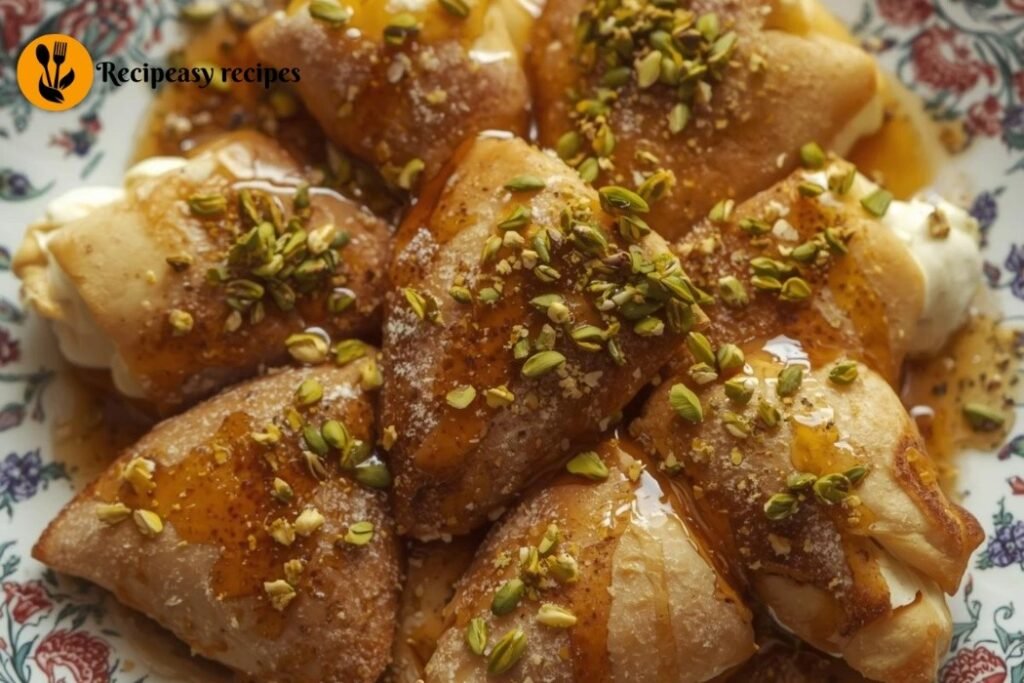
Step 4: Fill and Shape: I place the filling in the centre of each pancake. Then I fold it into a half-moon shape and gently press the edges to seal it. This step feels creative and satisfying every time.
Step 5: Fry or Bake: Commonly, I use hot oil to shallow-fry the atayef until it is crispy and golden brown. I bake them at other times. In both cases, the final result is excellent. When I’m finished, I soak them in heated sugar syrup.
Step 6: Serve and Enjoy: I place the Atayef on a platter and add some crushed nuts on top. The final dish has a soft inside and a crispy outside. The kitchen is filled with the scent, which makes it feel happy.
How to Store Atayef Recipe
In a way to maintain their flavor, I always keep the extra Atayef properly. In order to maintain their softness without drying out, I place the unfried Atayef in an airtight container and keep them in the fridge for no more than two days.
Although freshly made fried atayef tastes finest, it may also be reheated in the oven without a microwave. Before serving, I also take care to avoid adding syrup. This prevents the Atayef from getting soggy and maintains them crispy.
Best Tips and Tricks
I’ve discovered over time that the secret to great Atayef is to give the batter the right amount of rest. The pancakes are light and airy because little bubbles appear when the batter is properly rested. To ensure they cook evenly and don’t burn, I always cook them over low to medium heat.
I never turn the pancakes over since they should only cook on one side. To keep the filling within, it’s also important to gently seal the edges. To balance the flavor, all I do is cut back on the amount of syrup if I want less sweetness.
Extra Ideas Related to Atayef
Over the years, I’ve tasted a number of Atayef varieties, and each one has its own unique flavor. Those who enjoy rich, creamy desserts would love Cheese Atayef. Atayef with nuts offers a delightful crunch and a very interesting flavor.
Every bite of the cream-filled Atayef is smooth and silky, like ultimate luxury. Children and chocolate lovers have always loved Chocolate Atayef. Sometimes I prefer a lighter option, so I bake Atayef instead of frying it. Traditional Atayef will always hold a special place in my heart, even though other varieties taste fantastic.
Why I Love It the Most
Atayef has a strong connection to tradition and family memories, which is why I love it. From preparing the batter to dipping the loaded pancakes in warm syrup, it is incredibly calming and enjoyable. Every step is calming and important. It brings warmth and peace to my house with its delicate texture, natural sweetness, and lovely scent.
For me, atayef is more than simply a dessert, but it’s a feeling that makes me happy and comfortable. Every bite brings back memories of spending time with loved ones, celebrating, and enjoying small moments of happiness.
Final Verdict
I really believe that Atayef is among the most satisfying and pleasant desserts ever made. It is extremely tasty, simple to prepare, and rich in customs and culture. To make it at home, you actually don’t need to be a professional chef.
You can make magic with basic ingredients, a little perseverance, and love. Warmth, tradition, and sweetness are all present in every bite. You will understand why atayef is a favorite worldwide and remains the greatest dessert of all time if you ever experience it.
FAQs
Can I make Atayef without frying?
Yes, you can make a healthier version of Atayef by baking it in the oven.
What filling is best for Atayef?
Cheese, nuts, and cream are the most popular fillings.
Can I prepare the Atayef batter in advance?
Yes, you can make the batter a few hours before and keep it chilled.
How sweet is Atayef?
It has a little sweetness, you can change the syrup’s sweetness.
Can I freeze Atayef?
It is possible to freeze and cook filled and unfried Atayef at a later time.
Is Atayef only made in Ramadan?
No, you can have it at any time, even though it is most popular during Ramadan.

Atayef Recipe: Soft & Sweet Middle Eastern Dessert
Course: DessertCuisine: Middle EasternDifficulty: Easy8–10 Atayef
servings30
minutes15
minutes220–280 kcal
kcalLearn how to make soft, sweet, and traditional Atayef at home with walnuts, cheese, or cream filling. Perfect for Ramadan or any celebration!
Ingredients
All-purpose flour
Fine semolina
Sugar
Salt
Baking powder
Instant yeast
Water
Milk
Vanilla extract
Directions
- Step 1: Prepare the Batter: In a bowl, I start by mixing flour, semolina, sugar, yeast, baking powder, and salt. After that, I whisk in some warm water to make sure there are no chunks. After making sure it is thick and smooth, I should let it sit for approximately half an hour until air bubbles start to form on the surface.
- Step 2: Cook the Atayef Pancakes: I put a nonstick pan on medium heat without adding any oil. I then cover the pan with small pieces of dough. One side of the pancakes is fried. I take them out once the surface has dried and it is full of bubbles. Until the batter becomes exhausted, this process is repeated.
- Step 3: Prepare the Filling: I continue to prepare the filling in the meantime. I grind walnuts or pistachios and add sugar and cinnamon for the nut filling. I make sure the cream/cheese filling is smooth and has a fresh flavor. Fillings shouldn’t be overly wet.
- Step 4: Fill and Shape: I place the filling in the centre of each pancake. Then I fold it into a half-moon shape and gently press the edges to seal it. This step feels creative and satisfying every time.
- Step 5: Fry or Bake: Commonly, I use hot oil to shallow-fry the atayef until it is crispy and golden brown. I bake them at other times. In both cases, the final result is excellent. When I’m finished, I soak them in heated sugar syrup.
- Step 6: Serve and Enjoy: I place the Atayef on a platter and add some crushed nuts on top. The final dish has a soft inside and a crispy outside. The kitchen is filled with the scent, which makes it feel happy.
Notes
- Give the Atayef batter the right rest for light, airy pancakes.
- Bubbles form on rested batter, making pancakes soft and fluffy.
- Cook Atayef on low to medium heat to avoid burning.
- Seal edges gently and never flip; cook only on one side.
- Adjust syrup quantity to balance sweetness to your liking.