Stop Throwing Away Chicken Skin — It Makes the Best Chips
Most people peel it off and toss it. Some feel vaguely guilty eating it. But chicken skin, when treated right, transforms into something genuinely snack-worthy thin, shatteringly crispy, and packed with savory flavor that store-bought chips can only dream about.
This chicken skin chips recipe is one of those happy accidents that becomes a permanent part of your cooking rotation. Once you try it, you’ll never look at chicken skin as waste again.
Why This Actually Works
The magic here is fat rendering. Chicken skin is loaded with fat just beneath the surface, and when you apply dry heat, that fat slowly renders out, leaving behind a thin, golden, crackling layer that crisps up beautifully.
There’s no breading, no complicated technique, and barely any prep. Honestly, the hardest part is not eating them straight off the tray.
What You’ll Need
The ingredients list here is refreshingly short. You don’t need much the skin does most of the work.
- Skin from 4–6 chicken thighs or a whole chicken (patted very dry)
- ½ tsp salt
- ½ tsp black pepper
- ½ tsp garlic powder
- ¼ tsp smoked paprika (optional but lovely)
- A light spray or brush of neutral oil (only if using the oven)
That’s genuinely it. Feel free to swap the paprika for cayenne if you want heat, or add a pinch of onion powder. The base seasoning is flexible, but salt is non-negotiable.
The Drying Step Nobody Skips Twice
Before anything else, your chicken skin needs to be completely dry. Pat it down with kitchen paper, then lay the pieces flat on a rack and leave them uncovered in the fridge for at least an hour or overnight if you can plan ahead.
Moisture is the enemy of crispiness. Any steam trapped under the skin during cooking will make it chewy instead of crisp. Seriously, this one step makes a bigger difference than any technique or tool.
Once dry, season both sides lightly and you’re ready to cook.
Three Ways to Cook Them
The Oven Method
Preheat your oven to 200°C (fan). Line a baking tray with parchment and place a wire rack on top. Lay the seasoned skin pieces flat in a single layer don’t overlap them.
Bake for 20–25 minutes until deeply golden and crispy. Keep an eye on them toward the end; they can go from perfect to burnt quickly. The oven method gives you a slightly more even result and is great if you’re making a big batch.
The Air Fryer Method
The air fryer is genuinely the fastest route here. Arrange pieces in a single layer in the basket, cook at 190°C for 10–13 minutes, and shake halfway through.
Results are excellent consistently crunchy with very little effort. If you’ve got an air fryer sitting on your counter, this is absolutely the method to use for a quick snack.
The Pan Method
For how to make crispy chicken skin in a pan, start with a cold, dry skillet. Lay the skins flat, press them down with a spatula or a heavy pan lid, and turn the heat to medium.
Cook for 6–8 minutes without moving them, then flip and cook another 3–4 minutes. The cold-pan start is key it lets the fat render slowly before things get too hot, which means better texture and less burning.
Getting the Crunch Right Every Time
A few things worth knowing before you start:
Don’t crowd the pan or tray. Overlapping pieces steam each other. Give them space and they’ll reward you with that satisfying snap.
Season after drying, not before. Salt draws out moisture, so seasoning too early can undo all your drying work. Season right before they go into the heat.
Let them cool on a rack. Setting them on a plate traps steam underneath. A rack keeps airflow going so they stay crisp as they cool.
Flavor Variations Worth Trying
Once you’ve nailed the basic version, it’s fun to play around. Try a pinch of cumin and chili flakes for something with a little kick. A light dusting of nutritional yeast after cooking gives a cheesy, umami flavor that’s surprisingly addictive.
For something sweeter, a tiny amount of brown sugar mixed into your spice blend caramelizes beautifully in the oven. Just use a small amount too much and it burns before the skin crisps.
Serving These Without Overthinking It
Honestly, they’re great on their own as a snack. But they also work incredibly well crumbled over soups, salads, or roasted vegetables as a crunchy topping sort of like a savory, meaty crouton situation.
Serve them alongside a cold beer, a tangy dip like sour cream with chives, or just eat them straight from the tray while pretending you’re going to save some for later.
Storage — Though They Rarely Last Long
If you somehow end up with leftovers, store them in a paper bag or a loosely covered container at room temperature. They stay reasonably crispy for about a day.
Avoid airtight containers the trapped moisture softens them quickly. If they lose their crunch, a quick 3-minute blast in the air fryer at 180°C brings them right back.
FAQ’s
Freezing isn’t really worth it here. They’re so quick to make that fresh is always the better call.
1. Can I make this chicken skin chips recipe in an air fryer?
Yes, this chicken skin chips recipe works perfectly in an air fryer. Simply place the seasoned chicken skin in a single layer and cook at 190°C for about 10–13 minutes, shaking the basket halfway through for even crispiness.
2. How do I make sure the chicken skin chips turn crispy?
The key to a crispy chicken skin chips recipe is removing moisture before cooking. Pat the skin dry with paper towels and leave it uncovered in the refrigerator for at least one hour or overnight so the skin dries out properly.
3. Do I need oil for this chicken skin chips recipe?
Not necessarily. Chicken skin naturally contains a lot of fat that renders during cooking. If you’re baking in the oven, a very light spray of oil can help with browning, but it’s usually not required for the chicken skin chips recipe.
4. How should I store leftover chicken skin chips?
If you have leftovers from this chicken skin chips recipe, store them in a paper bag or loosely covered container at room temperature. Avoid airtight containers because trapped moisture can make the chips soft.
5. Can I add different seasonings to this chicken skin chips recipe?
Absolutely. This chicken skin chips recipe is very flexible. You can add cayenne for heat, cumin and chili flakes for spice, or nutritional yeast for a cheesy flavor depending on your taste preferences.
Conclusion
This is one of those recipes that feels almost too simple to take seriously until you actually make it. There’s something deeply satisfying about turning something most people discard into the best thing on the snack table.
So next time you’re breaking down a chicken, save the skin. This chicken skin chips recipe is quick, nearly zero-waste, endlessly customizable, and frankly kind of addictive. Make it once and see if you don’t find yourself buying whole chickens just for the skin.
Stop Throwing Away Chicken Skin — It Makes the Best Chips
Course: Snacks, AppetizersCuisine: AmericanDifficulty: Easy3
servings10
minutes25
minutes150
kcalThis chicken skin chips recipe turns leftover chicken skin into ultra-crispy, savory chips. Easy to make in the oven, air fryer, or pan, it’s a simple zero-waste snack packed with flavor.
Ingredients
½ tsp salt
Skin from 4–6 chicken thighs or 1 whole chicken
½ tsp black pepper
½ tsp garlic powder
¼ tsp smoked paprika (optional)
Light spray of neutral oil (only for oven method)
Directions
- Step 1 – Dry the Skin
Pat the chicken skin completely dry with paper towels. Place it on a rack and refrigerate uncovered for at least 1 hour or overnight to remove moisture. - Step 2 – Season
Once dry, sprinkle salt, black pepper, garlic powder, and smoked paprika evenly on both sides. - Step 3 – Cook the Chicken Skin Chips
Oven Method
Preheat oven to 200°C (fan).
Place skin on a rack over a lined baking tray.
Bake 20–25 minutes until golden and crispy.
Air Fryer Method
Preheat air fryer to 190°C.
Arrange skins in a single layer.
Cook 10–13 minutes, shaking halfway.
Pan Method
Place skins in a cold dry skillet.
Turn heat to medium and cook 6–8 minutes.
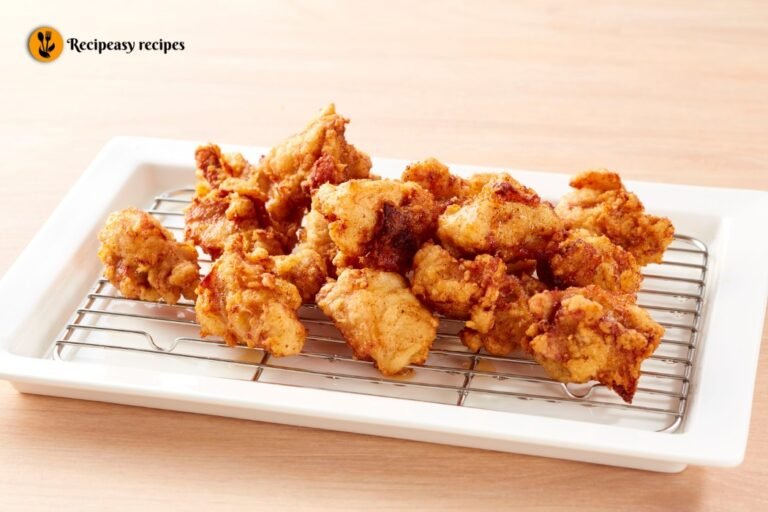
Flip and cook another 3–4 minutes until crispy. - Step 4 – Cool and Serve
Transfer chips to a rack and let them cool slightly before serving.
Notes
- Always dry the skin properly for the crispiest results.
- Cool chips on a wire rack to keep them crunchy.
- Avoid overcrowding the tray or pan.