Chili Garlic Sauce Recipe Better Than Sriracha – Ready in 20 Minutes
It started as a desperate kitchen fix. I was halfway through making spring rolls, completely out of sriracha, and staring at a bag of fresh red chiles and half a head of garlic on my counter. I figured I’d blend something together and hope for the best. What came out of that blender was a rough, unbalanced mess too sharp, too raw tasting, weirdly watery. But something about the bones of it felt right. So I kept working on it.
That was maybe two years ago. Since then, this chili garlic sauce recipe has become the one condiment I genuinely can’t run out of. It goes on everything. And now that I’ve made it enough times to know exactly where it can go wrong, I want to share the version that actually works.
Start Here — Why Fresh Chiles Change Everything
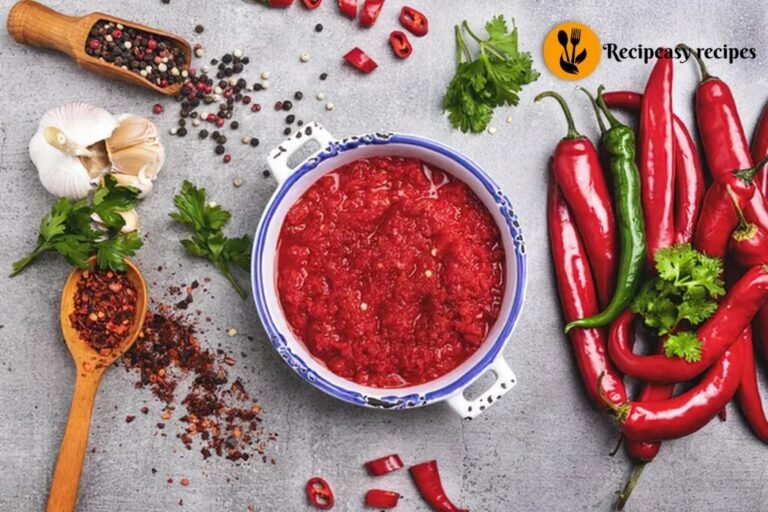
Most store-bought versions of this sauce are made with processed, preserved chiles. They’re fine. But when you use fresh red chiles and real garlic and cook them down yourself, the flavor has this brightness and depth that a jar simply cannot replicate.
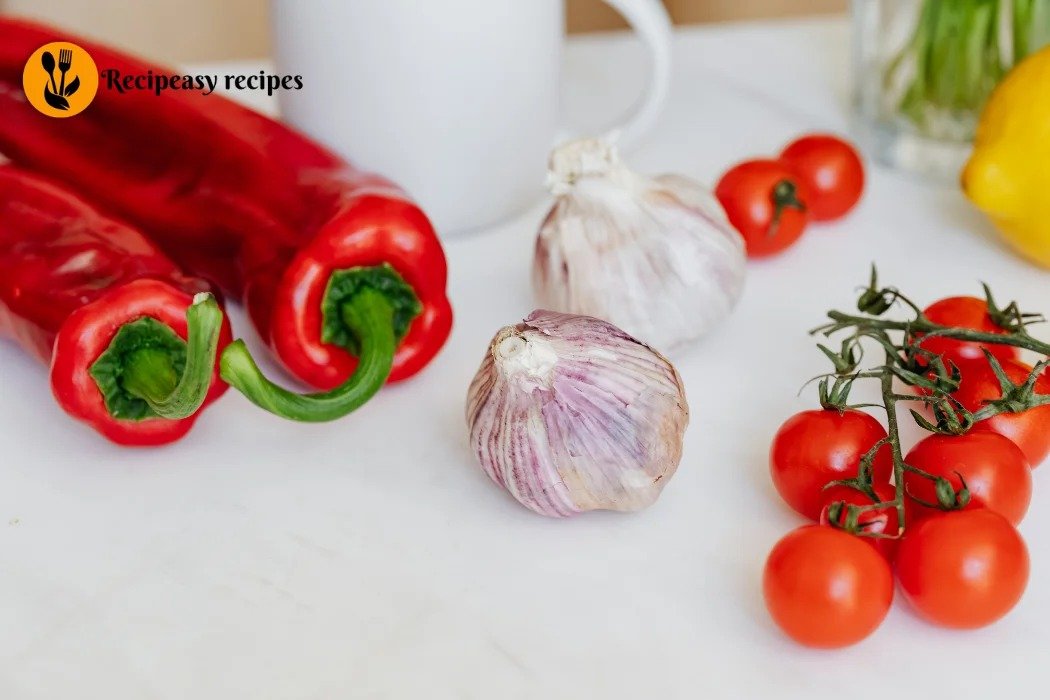
The chili garlic sauce ingredients I use are straightforward, and you probably have most of them already.
250g fresh red chiles — Fresno chiles work beautifully here, or a mix of red jalapeños and Thai bird chiles if you want more heat 8 to 10 garlic cloves 3 tablespoons white vinegar 1 tablespoon rice vinegar (this adds a gentler sourness that white vinegar alone doesn’t have) 1 teaspoon sugar 1 teaspoon salt 2 tablespoons neutral oil 1 tablespoon water, added only if the paste gets too thick while cooking
That’s the whole list. No cornstarch, no preservatives, no mystery ingredients. Just real things you can taste and adjust.
One quick note on the chiles — the ratio of Thai bird chiles to Fresno chiles is where you control the heat level. More bird chiles means more fire. More Fresnos keeps it manageable. I usually do about a 30/70 split, which gives a medium heat that builds slowly rather than hitting you all at once.
Blending First, Cooking Second
This is the part that took me a few tries to get right, because it’s the opposite of what I expected.
Start by roughly chopping your chiles and garlic. You don’t need to be precise — just get them into manageable pieces for the blender. Toss them in with both vinegars, the sugar, and the salt. Blend until you have a coarse paste. Not completely smooth, not chunky — somewhere in between where you can still see small flecks of chile skin and garlic but it’s mostly broken down.
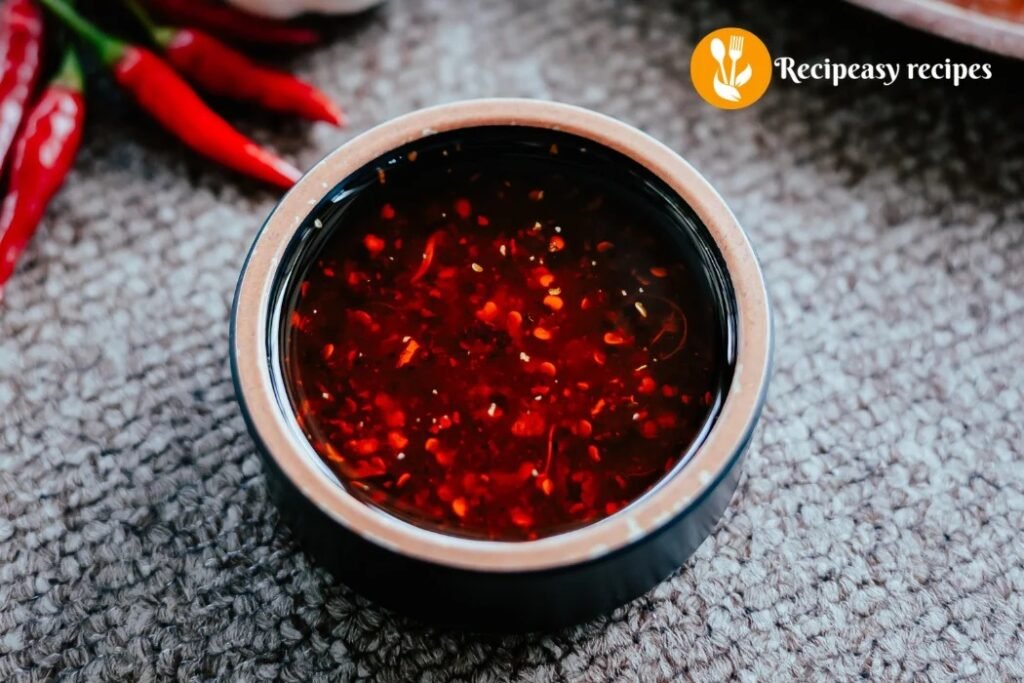
At first, I thought skipping the cooking step would be fine. Just blend it and call it a sauce. But raw blended chiles have this harsh, almost metallic edge that doesn’t settle well on the palate. Cooking it briefly transforms the whole thing. The sharpness mellows, the garlic sweetens slightly, and the color deepens from a bright red to a richer, darker crimson.
So heat your oil in a small saucepan over medium heat. Add the blended paste and let it cook, stirring fairly often, for about 10 to 12 minutes. You’ll hear it go from a loud sizzle to a quieter simmer as the moisture reduces. The smell in those first few minutes is intense — pungent, garlicky, almost overwhelming. Then around the 8-minute mark it shifts to something warmer and more inviting. That shift is your signal that it’s almost done.
If it starts sticking to the bottom before it’s ready, add that tablespoon of water and lower the heat slightly.
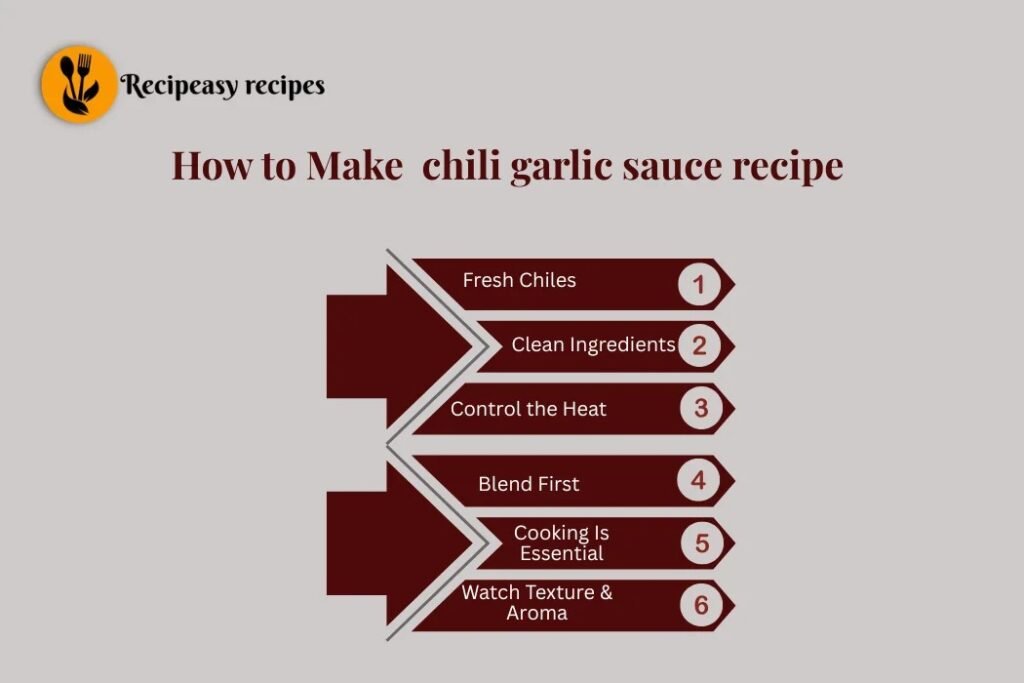
The Texture Question
This is worth talking about because people have different preferences here and both approaches work well.
If you want a smoother, more pourable sauce — the kind that drizzles easily over dumplings or gets mixed into marinades — blend it again after cooking. Just let it cool for five minutes first, then give it another 20-second pulse in the blender. It’ll become glossy and almost sauce-like in consistency.
If you want something with more body and a bit of chunkiness — better for spreading on sandwiches or spooning over rice — just leave it as-is after cooking. The texture holds up and actually improves after a day in the fridge.
I personally prefer the chunkier version for most things. But when I’m making a simple chili garlic sauce recipe to mix into salad dressing or use as a dipping sauce for dim sum, I always go with the blended-smooth version.
Getting the Balance Right
Here’s something I had to learn through trial and error: this sauce should hit at least four flavor notes heat, acid, sweetness, and salt. If any one of them dominates too much, the whole thing falls flat.
Too sharp? A little more sugar. Too sweet? Tiny splash more white vinegar. One-dimensional heat with no depth? That usually means it didn’t cook long enough. Tastes flat overall? Almost always needs more salt than you think.
The first time I made a version I was really happy with, I tasted it probably eight times during the last five minutes of cooking, adjusting each time. Don’t be afraid to do the same. It’s a forgiving sauce small additions make a noticeable difference.
Also, keep in mind that the flavor will continue developing after it cools. So if it tastes just slightly underseasoned right off the stove, it’ll often come right by the time it’s been in the fridge overnight. I’ve made the mistake of oversalting while it was still hot, only to find it too sharp the next morning.
The Sweet Version (Worth Trying at Least Once)
A sweet chili garlic sauce recipe is a slightly different direction but just as good. If that’s the route you want to take, double the sugar to two full teaspoons and add a small tablespoon of honey right at the end of cooking, after the heat is off. The honey gets stirred in off the heat so it doesn’t cook down and lose its floral quality.
That version is almost like a homemade sweet chili dipping sauce, but with much more garlic presence and actual heat. It’s incredible on grilled chicken, as a glaze on shrimp, or just as a dipping sauce for anything fried. My kids actually prefer that version over the standard one, which tells you something about how accessible it is.
How I Store It and How Long It Actually Lasts
Transfer the finished sauce into a clean glass jar with a tight lid. I usually use a small 250ml mason jar. It keeps well in the refrigerator for up to three weeks, and honestly the flavor is at its best somewhere between day two and day ten.
The vinegar and salt act as natural preservatives here, so you don’t need to worry too much about it spoiling quickly. However, always use a clean spoon when you scoop from the jar moisture or food contamination can shorten the shelf life significantly.
If you want to make a larger batch and keep some longer, you can also freeze it in an ice cube tray and then transfer the cubes to a freezer bag. Each cube is roughly a tablespoon perfect for pulling out single portions whenever you need them.
What I Actually Use This On
Pretty much everything. But the combinations I keep coming back to: fried eggs in the morning with a spoon of this on top, cold sesame noodles with a big tablespoon stirred through, steamed dumplings as a dipping sauce, roasted cauliflower drizzled generously, and inside wraps or bao where you’d otherwise use sriracha.
The best chili garlic sauce recipe for you is ultimately the one you adjust to your own heat tolerance and flavor preferences. What I’ve shared here is the baseline reliable, balanced, and genuinely better than anything I’ve found in a store. Once you’ve made it a couple of times, you’ll start instinctively knowing when it needs more acid or a little more sweetness without even tasting it. That’s when you know it’s become yours.
How to make chili garlic sauce from scratch is one of those skills that feels small but ends up changing how you cook in a real, daily way. It took me a few messy attempts to get here, but this version the one I’m sharing now is the one I’ve made at least fifty times. And I’m still not tired of it.

Chili Garlic Sauce Recipe Better Than Sriracha – Ready in 20 Minutes
Course: SauceCuisine: Asian InspiredDifficulty: Easy12
servings10
minutes12
minutes420
kcalIngredients
250g fresh red chiles (Fresno, red jalapeños, or Thai mix)
8–10 garlic cloves
3 tbsp white vinegar
1 tbsp rice vinegar
1 tsp sugar
1 tsp salt
2 tbsp neutral oil
1 tbsp water (if needed during cooking)
Optional (Sweet Version):
2 tsp sugar
1 tbsp honey (added at the end)
Directions
- Prep Ingredients:
Roughly chop chiles and garlic. - Blend the Base:
Add chiles, garlic, both vinegars, sugar, and salt to a blender. Blend into a coarse paste. - Heat the Oil:
Warm neutral oil in a saucepan over medium heat. - Cook the Sauce:
Add the blended paste and cook for 10–12 minutes, stirring often. - Adjust Consistency:
Add a tablespoon of water if it becomes too thick or starts sticking. - Watch for Flavor Change:
Cook until the sauce deepens in color and aroma becomes rich instead of sharp. - Optional Smooth Texture:
Let cool slightly, then blend again for a smoother sauce. - Final Adjustments:
Taste and adjust salt, sugar, or vinegar as needed. - Cool & Store:
Transfer to a clean jar and refrigerate.
Notes
- Cooking removes the harsh raw taste of garlic and chiles
- Flavor improves after 1–2 days in the fridge
- Balance = heat + acid + salt + slight sweetness
- Use Fresnos for milder heat, Thai chiles for more spice