Chili Garlic Oil Recipe You’ll Never Buy Again – Ready in 20 Minutes
I used to keep a bottle of chili garlic sauce in my fridge at all times. The kind with the rooster on the label. And for years I thought that was enough. Then one evening I accidentally made a small batch of homemade chili garlic oil recipe while trying to fix a bland stir-fry, and I haven’t touched that bottle since.
It’s one of those things that sounds like it requires more effort than it actually does. The whole process takes maybe 20 minutes, and what you end up with is something so much more fragrant, more layered, and more alive than anything that comes from a supermarket shelf.
Let me walk you through exactly how I make it.
What You’ll Need
The chili garlic oil ingredients are simple, which is honestly part of the appeal. You don’t need much, but the quality of each thing matters more than it would in a dish with twenty components.
About 10 to 12 dried red chiles — I use a mix of Thai bird chiles and Kashmiri for color and a gentler heat 8 to 10 garlic cloves, thinly sliced (not minced, sliced — this makes a real difference) 1 cup neutral oil, like grapeseed or a light vegetable oil 1 tsp sesame oil, added at the very end ½ tsp salt Optional: ½ tsp sugar if you want to lean into a sweet chili garlic oil recipe version
That’s genuinely it. The magic is in the technique, not a long ingredient list.
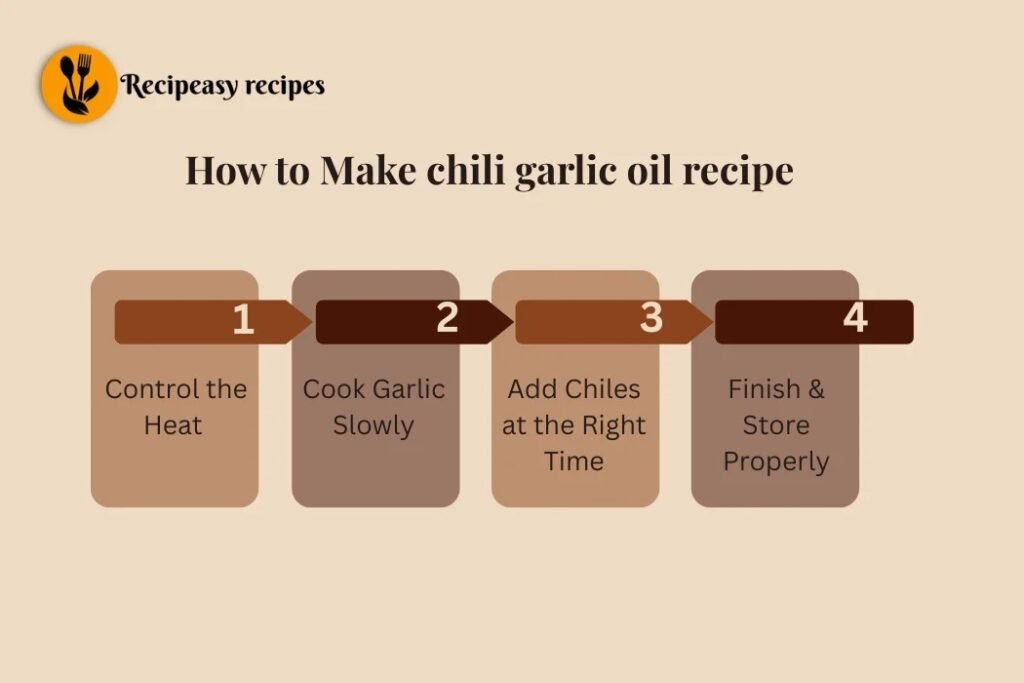
The Part That Tripped Me Up the First Time
My first attempt was a disaster, and I’ll tell you exactly why I heated the oil too high and dumped everything in at once. The garlic went from raw to dark brown in about 45 seconds, and the whole thing smelled bitter and sharp. I poured it out and started over.
The key to a best chili garlic oil recipe is low, slow heat. You want the oil to be warm enough to gently bubble around the garlic, not aggressively fry it. Think of it more like a slow infusion than a sauté.
So here’s how I actually do it now.
Pour your neutral oil into a small saucepan and set it over low to medium-low heat. While it warms, slice your garlic as thin as you can manage. If some slices are uneven, that’s fine the thinner ones will crisp up more, which adds a nice textural contrast in the final jar.
Once the oil is warm (you can test it by dropping in one garlic slice it should sizzle gently, not violently), add all the sliced garlic. Let it slowly turn golden over about 8 to 10 minutes. Stir occasionally but don’t fuss over it constantly.
Meanwhile, roughly crush your dried chiles. I do this by hand right over the pan, just tearing them into rough pieces. You can remove the seeds for milder heat or leave them in. I usually leave about half in.
When the garlic is pale golden not deep brown, not still white add the chiles. Also add your salt here. The oil will bubble up a bit more, and within a minute or two the chiles will deepen in color and the whole kitchen will smell incredible. There’s a toasty, slightly smoky warmth to it that’s hard to describe but immediately recognizable.
After another 3 to 4 minutes on low heat, turn the burner off and let the oil sit for a few minutes before adding the sesame oil. The residual heat will keep doing its work without the risk of burning anything.
That small wait before adding sesame oil was a tip I got from my neighbor who grew up making this weekly, and she was absolutely right. Sesame oil added to screaming hot oil loses most of its fragrance. Added to oil that’s cooled just slightly, it blooms beautifully.
The Sugar Thing (And When I Actually Use It)
I mentioned the optional sugar, and it’s worth talking about separately. A small pinch of sugar really just half a teaspoon in a full cup of oil doesn’t make the chili oil taste sweet. What it does is round out the edges. It softens any bitterness from the chiles and brings a subtle balance that I find makes it more versatile. This is my go-to tweak when I know I’m going to use the oil on something that needs a bit more complexity, like dumplings or roasted vegetables. For plain noodles or fried eggs, I usually skip it.
Storing It and How Long It Lasts
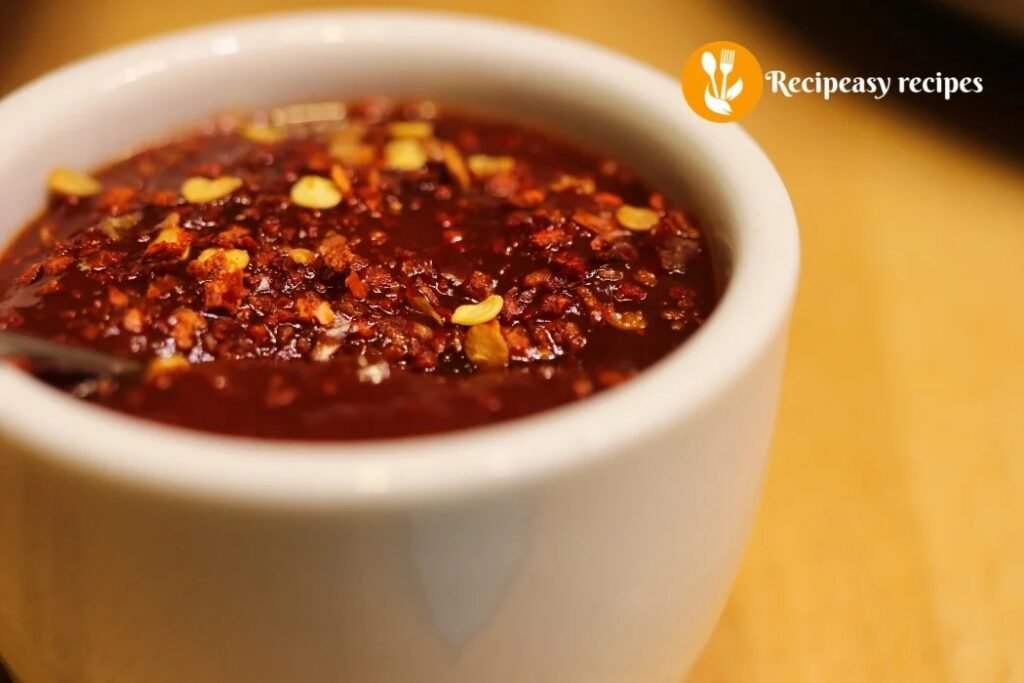
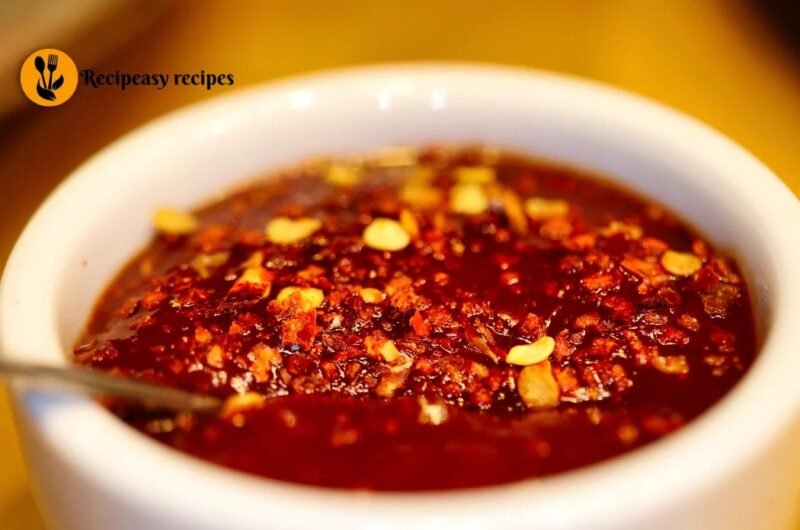
Transfer everything the oil, the garlic pieces, the chile bits into a clean glass jar. I like to use a small mason jar with a tight lid. Keep it at room temperature if you’ll use it within a week, or refrigerate it for up to three weeks. The garlic will continue to soften and meld with the oil the longer it sits, and honestly, it tastes even better on day three than it does fresh.
One thing to note: if you refrigerate it, the oil will solidify slightly. Just bring it to room temperature for a few minutes before using and it loosens right back up.
Ways I Use It Every Single Week
This isn’t a condiment I pull out for special occasions. It goes on scrambled eggs in the morning, gets drizzled over rice bowls at lunch, and gets stirred into noodles or spooned onto roasted broccoli at dinner. Anywhere you’d add a bit of heat and depth, this does the job better than almost anything else in my kitchen.
If you’ve been looking for an easy chili garlic oil recipe that you can actually finish in under half an hour and use for a dozen different things, this is it. The first batch always teaches you something maybe your heat was a little too high, maybe you want more garlic next time, maybe you’ll try adding a small piece of star anise for a more fragrant version. That’s part of the process.
The point is, once you’ve made your own chili garlic oil recipe from scratch, going back to the bottled kind genuinely feels like a step backward. It’s one of those small kitchen skills that quietly improves everything around it.
FAQs
1. What oil is best for a chili garlic oil recipe?
Neutral oils like grapeseed or vegetable oil work best because they let the garlic and chiles shine without overpowering the flavor.
2. Why is my chili garlic oil bitter?
It’s usually due to overheating or burning the garlic. Always cook on low heat and stop once garlic turns light golden.
3. Can I make this chili garlic oil recipe less spicy?
Yes, remove most of the chile seeds or use milder chiles like Kashmiri to reduce heat while keeping color.
4. How long does homemade chili garlic oil last?
It lasts about 1 week at room temperature or up to 3 weeks in the refrigerator in a sealed jar.
5. What can I use chili garlic oil for?
This chili garlic oil recipe is perfect for noodles, dumplings, eggs, rice bowls, stir-fries, and roasted vegetables.
Chili Garlic Oil Recipe You’ll Never Buy Again – Ready in 20 Minutes
Course: SaucesCuisine: Asian-InspiredDifficulty: Easy12
servings10
minutes15
minutes120
kcalIngredients
10–12 dried red chiles (Thai + Kashmiri mix recommended)
8–10 garlic cloves, thinly sliced
1 cup neutral oil (grapeseed or vegetable oil)
1 tsp sesame oil (added at the end)
½ tsp salt
Optional: ½ tsp sugar (for balance)
Directions
- Heat the Oil Gently:
Pour oil into a small saucepan and heat on low to medium-low. - Prepare Garlic:
Thinly slice garlic (not minced for best texture). - Infuse Garlic:
Add garlic to warm oil. Let it cook slowly for 8–10 minutes until lightly golden, stirring occasionally. - Add Chiles:
Roughly crush dried chiles and add to the oil along with salt. - Simmer for Flavor:
Let everything cook on low heat for 3–4 minutes until fragrant. - Turn Off Heat:
Remove from heat and let it cool slightly for a few minutes. - Finish with Sesame Oil:
Stir in sesame oil once the oil is no longer extremely hot. - Optional Balance:
Add sugar if you want a slightly rounded flavor. - Store:
Transfer to a clean glass jar and let flavors develop.
Notes
- Low heat is the secret to the best chili garlic oil recipe
- Tastes even better after 2–3 days
- Mix of chiles gives better color and balanced heat
- Burnt garlic will make the oil bitter—watch closely