Chile Food Recipe That Actually Warmed My Whole House
I’ll be honest the first time I made a proper chile food recipe from scratch, I burned the onions, forgot to drain the beans, and still ended up with something so good that my neighbor asked for the recipe. There’s something forgiving about chili. It’s one of those dishes that almost wants to succeed.
I’ve been making some version of this for years now, mostly on cold weeknights when I want something filling without spending two hours in the kitchen. Over time, I’ve tweaked the spice levels, swapped proteins, tried it meatless and I want to walk you through the version I keep coming back to.
Let’s Start With the Base (This Part Matters More Than People Think)
A lot of people underestimate the aromatics. I used to just toss everything into the pot together and wonder why my chili always tasted a little flat. The fix was embarrassingly simple: cook your onion and garlic low and slow until they’re truly soft and golden. Not rushed. Not translucent. Actually golden.
For this, you’ll need:
— 1 large yellow onion, diced — 4 cloves garlic, minced — 2 tablespoons olive oil or any neutral oil — 1 green bell pepper, chopped (optional but adds a nice mild sweetness)
Heat your oil in a heavy-bottomed pot I use a Dutch oven and cook the onion on medium-low for about 8 to 10 minutes. Add the garlic after that, not before, or it’ll brown too fast and turn bitter. This alone changed the flavor of my chili completely.
The Spice Situation
This is where people either nail it or play it too safe. My spice mix for this simple recipe looks like this:
— 2 tablespoons chili powder (the real kind, not cayenne) — 1 teaspoon cumin — 1/2 teaspoon smoked paprika — 1/2 teaspoon oregano — Salt and black pepper to taste — A pinch of cayenne if you like heat
Once the onions are done, add all the spices directly to the pot and stir for about 60 seconds before adding anything wet. I learned this trick from a cooking video years ago toasting the spices in the oil wakes them up. The smell alone is worth doing it.

Making It Vegetarian (Or Not)
Here’s where you get to decide. I make this as a vegetarian recipe probably three times out of four. When I skip the meat, I double the beans and sometimes add a diced sweet potato it gives the chili a slightly thick, hearty body without feeling like it’s missing anything.
If you’re going the vegetarian route, add:
— 1 can black beans, rinsed and drained — 1 can kidney beans, rinsed and drained — 1 medium sweet potato, peeled and cut into small cubes (add early so it has time to soften)
If you want meat, brown about 500 grams of ground beef or turkey in the same pot before the onions. Drain the fat, set it aside, then do the onion-garlic step. Add the meat back in when you add the tomatoes.
Building the Body
After the spices, add:
— 1 can (400g) crushed tomatoes — 1 can (400g) diced tomatoes — 1 cup vegetable or chicken broth — A small splash of apple cider vinegar — this was a tip from my aunt and I thought it sounded weird, but it genuinely brightens the whole thing
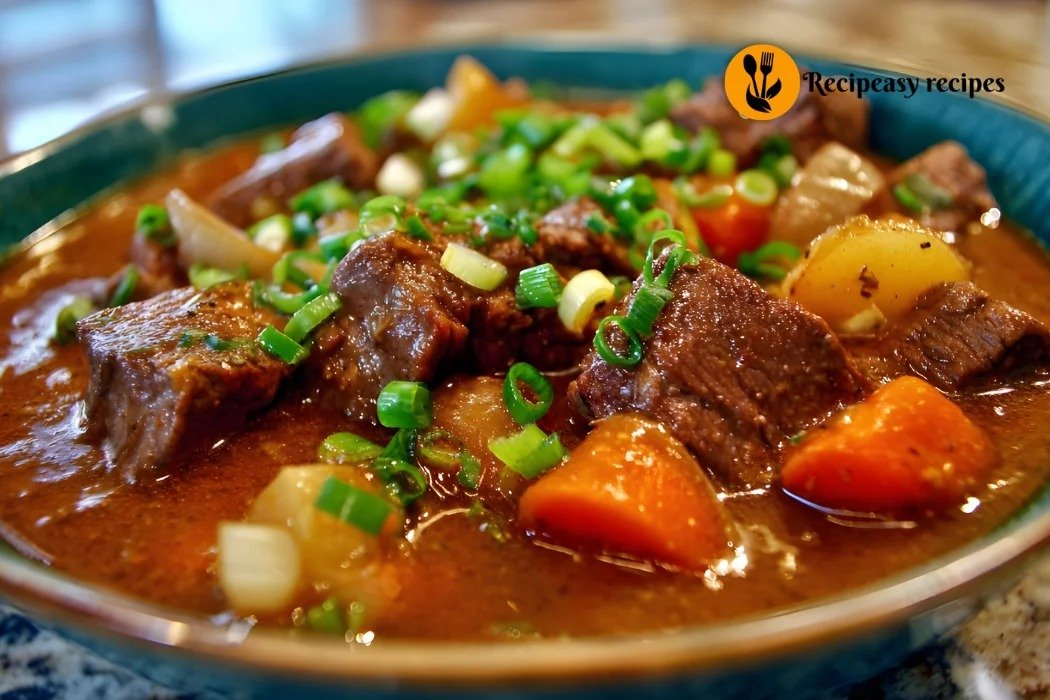
Stir everything together. The pot should look rich and reddish-brown at this point, and it should smell incredible. Also, don’t be alarmed if it looks a little thin it’ll thicken up as it simmers.
The Simmer Is Where the Magic Happens
This is one of those easy recipes where time does the heavy lifting. Let the chili simmer uncovered on low heat for at least 30 to 40 minutes. Stir every now and then. I usually set a timer and go do something else fold laundry, answer emails, whatever.
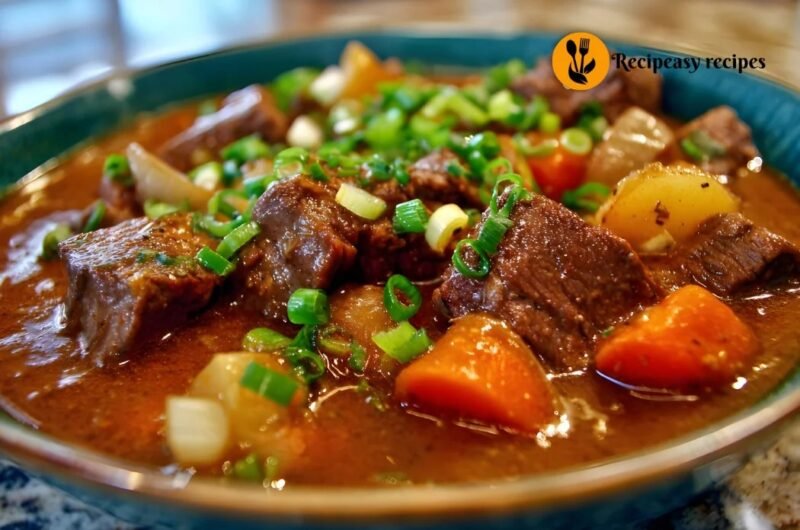
What you’re looking for: the chili should thicken noticeably, the sweet potato (if using) should be fork-tender, and the flavors should taste like they’ve blended together rather than sitting separately. If it gets too thick, just add a splash more broth.
Around the 25-minute mark, taste it and adjust. More salt? More chili powder? A little more vinegar? This is your dish trust your palate here.
What to Serve It With
This is genuinely one of my favorite recipes for dinner because it goes with almost everything. I usually serve it over plain white rice on weeknights because it stretches the portions and makes cleanup easier. On weekends, I’ll make a simple batch of cornbread or just toast thick slices of sourdough.
Toppings that make a real difference:
— Sour cream or Greek yogurt — Shredded cheddar, melted on top while the chili is still hot — Fresh cilantro if you like it — Pickled jalapeños for extra kick — A squeeze of fresh lime juice right before eating
The lime especially I skipped it for years and then tried it once and now I can’t go back.
A Few Things I Wish I’d Known Earlier
The chili is almost always better the next day. Something about sitting overnight in the fridge lets everything meld together. So if you’re making this chile food recipe for a dinner party or a gathering, consider making it the night before and reheating it slowly on the stove.
Also and I say this from experience don’t add the salt until the end. The broth and canned tomatoes already carry a lot of sodium, and it’s easy to over-salt early. Taste at the end and add from there.
One more thing: if your chili ends up too spicy (I’ve done this gone too heavy on the cayenne), a spoonful of honey or a small pour of cream can actually pull the heat back without ruining the flavor. Sounds strange but it genuinely works.
This whole recipe, start to finish, takes about an hour. Most of that is hands-off simmering time. It’s the kind of meal that feels like effort but really isn’t which makes it perfect for busy evenings when you want something homemade and hearty but don’t want to be stuck at the stove all night.
Once you make it a few times, you’ll stop measuring and start doing it by feel. That’s when you know a recipe has actually become yours.
FAQs
1. What makes this chile food recipe different from regular chili?
This chile food recipe focuses on slow-cooked aromatics and toasted spices, which create a deeper and richer flavor compared to quick chili recipes.
2. Can I make this chile food recipe vegetarian?
Yes, this recipe works perfectly as a vegetarian option by using beans and sweet potatoes instead of meat.
3. How can I make my chile food recipe less spicy?
You can reduce cayenne pepper or balance the heat by adding a bit of honey, cream, or yogurt.
4. Can I store and reheat this chile food recipe?
Absolutely. Store it in the fridge for up to 3–4 days. It actually tastes better the next day as flavors develop more.
5. What are the best toppings for this chile food recipe?
Popular toppings include shredded cheese, sour cream, cilantro, jalapeños, and a squeeze of fresh lime juice.
Chile Food Recipe That Actually Warmed My Whole House
Course: MainCuisine: American / Tex-Mex InspiredDifficulty: Easy6
servings15
minutes40
minutes400
kcalIngredients
Base:
1 large yellow onion (diced)
4 cloves garlic (minced)
2 tbsp olive oil
1 green bell pepper (optional)
Spices:
2 tbsp chili powder
1 tsp cumin
½ tsp smoked paprika
½ tsp oregano
Salt & black pepper (to taste)
Pinch of cayenne (optional)
Main Ingredients:
1 can crushed tomatoes (400g)
1 can diced tomatoes (400g)
1 cup broth (vegetable or chicken)
1 tbsp apple cider vinegar
Protein Options:
Vegetarian:
1 can black beans (rinsed)
1 can kidney beans (rinsed)
1 medium sweet potato (cubed)
Meat Option:
500g ground beef or turkey
Directions
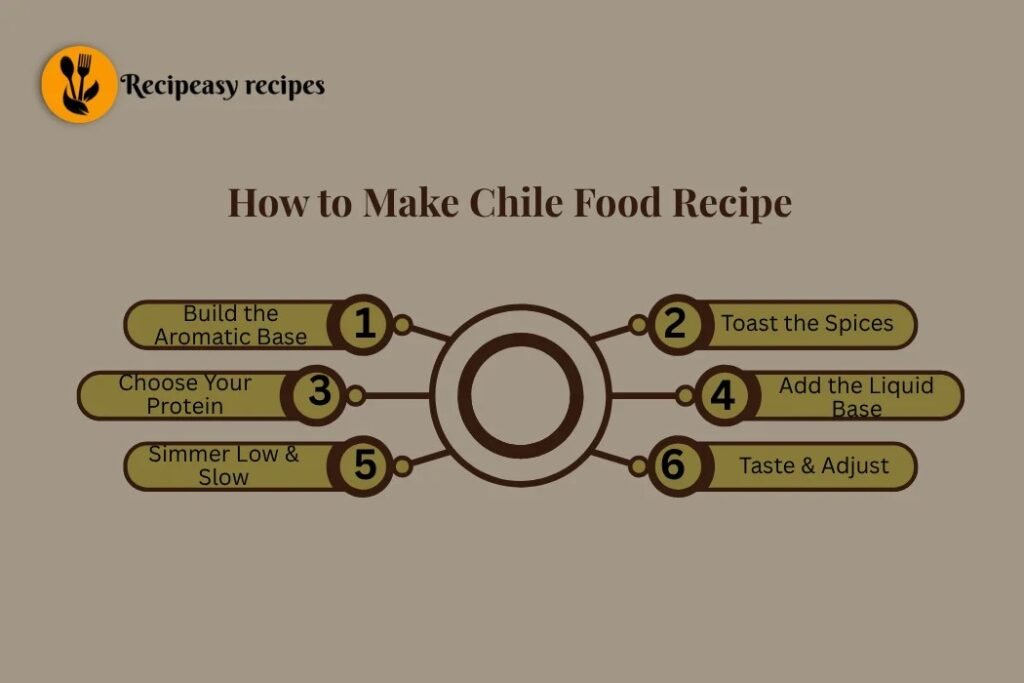
- Cook Aromatics:
Heat oil in a pot. Add onion and cook on medium-low for 8–10 minutes until golden. Add garlic and cook 1 minute. - Toast Spices:
Add all spices and stir for 60 seconds to release flavor. - Add Protein:
If using meat: brown it first separately, then add back.
If vegetarian: add beans and sweet potato. - Build the Base:
Add tomatoes, broth, and vinegar. Mix well. - Simmer:
Cook uncovered on low heat for 30–40 minutes. Stir occasionally. - Adjust Taste:
Add salt, spice, or vinegar as needed.
Notes
- Chili tastes even better the next day
- Add lime juice at the end for brightness
- If too spicy, add honey or cream