Easy Barley Bread Recipe | Healthy & Homemade Loaf
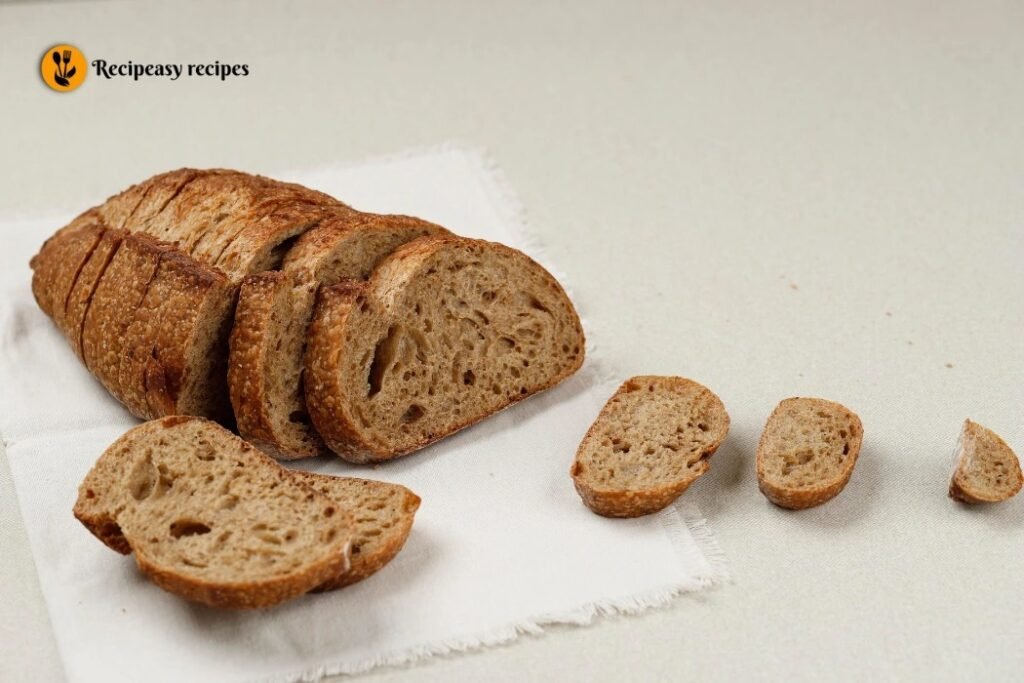
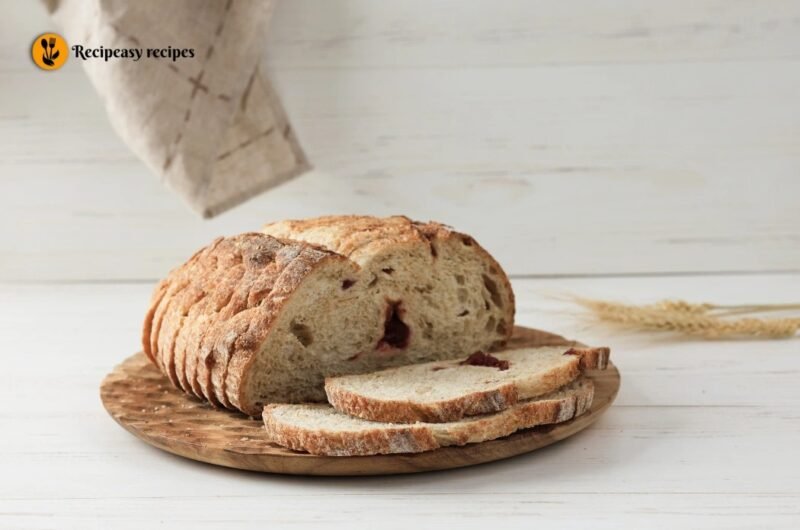
The barley bread recipe is one of those timeless dishes that blend simplicity, health, and heritage into a single loaf. I remember the first time I baked this bread it filled my kitchen with a nutty aroma that felt warm and rustic. Each slice was soft inside and slightly crisp on the outside, perfect for breakfast or dinner.
What makes this recipe truly special is its wholesome flavor and earthy texture. Barley has been cherished for centuries as a nourishing grain, and this bread recipe highlights its goodness in the most delightful way. Whether you’re an experienced baker or a beginner, this recipe will guide you step by step to create a loaf that tastes as wonderful as it smells.
The Story and Roots Behind Barley Bread
Barley bread has ancient origins dating back to thousands of years ago. In early civilizations like Egypt, Greece, and Rome, barley was considered a “poor man’s grain,” but its nutritional value made it a staple in many households. Over time, it became a symbol of health and simplicity, especially in European and Middle Eastern cuisines.
Today, barley bread is making a comeback as people seek healthier alternatives to white or refined breads. It’s packed with fiber, vitamins, and a distinct nutty taste that makes it both traditional and trendy.
Understanding the Barley Bread Recipe
Barley bread is made using barley flour, often mixed with a bit of wheat flour for better rise and structure. It produces a dense yet tender loaf that’s perfect with butter, soups, or even as toast. The recipe focuses on bringing out the natural flavor of barley while keeping the ingredients simple and wholesome.
This is not just a bread it’s a nutritious experience that combines history, health, and flavor into one satisfying bake.
What Makes This Barley Bread Worth Baking
There are several reasons to try this old-fashioned barley bread recipe. It’s easy to prepare, highly nutritious, and offers a flavor that’s quite different from regular bread. The barley gives it a rich, nutty aroma and a slightly chewy texture.
Plus, this bread is ideal for anyone looking to reduce refined flour intake or improve digestion. You’ll appreciate its rustic charm and the satisfaction of baking something both healthy and homemade.
Tools & Essentials for Baking Barley Bread
Before you begin, make sure you have the following tools ready:
- Mixing bowls: For combining dry and wet ingredients.
- Wooden spoon or spatula: To mix the dough gently.
- Measuring cups and spoons: Precision ensures consistent results.
- Loaf pan: A standard bread loaf pan (8×4 inches) works best.
- Oven: Preheated to the right temperature for even baking.
- Cooling rack: Helps the bread cool evenly after baking.
Having these essentials will make your baking process smooth and enjoyable.
Ingredients You’ll Need for Barley Bread
Here’s everything you’ll need to make this recipe:
- 2 cups barley flour
- 1 cup whole wheat flour
- 1 tsp baking powder
- 1 tsp salt
- 1 tbsp honey or sugar (optional for sweetness)
- 1 cup warm water or milk
- 2 tbsp olive oil or melted butter
- 1 tsp active dry yeast (if you prefer a lighter texture)
These ingredients create a flavorful, slightly dense loaf with a comforting aroma.
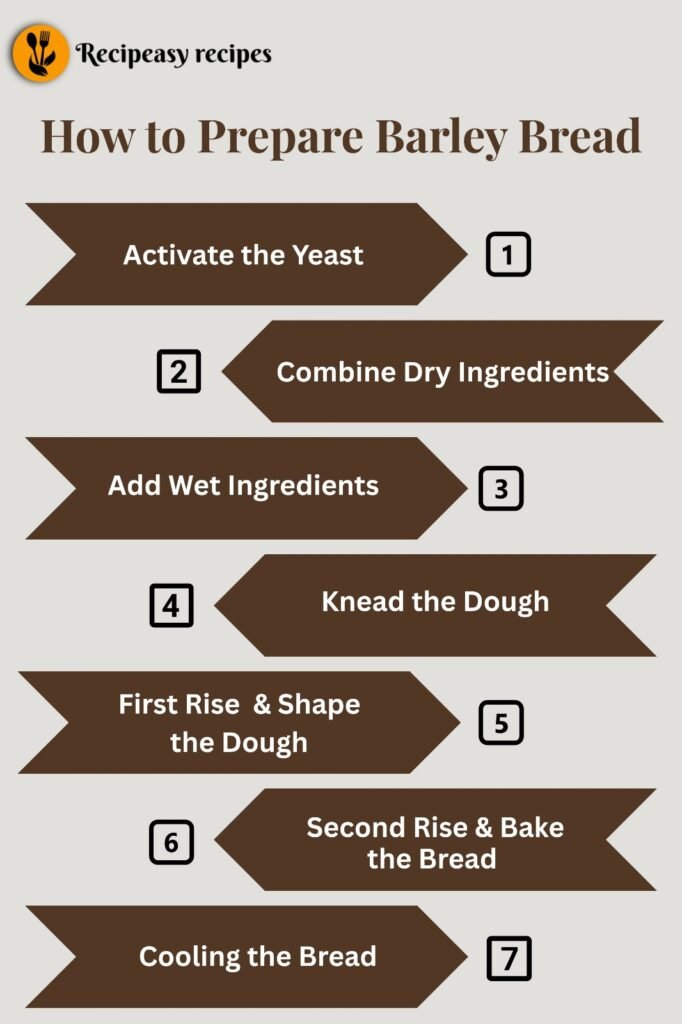
How to Prepare Barley Bread – Step-by-Step Guide
Making barley bread from scratch is not just about baking it’s about creating something wholesome, aromatic, and deeply satisfying. The process may take a little time, but each step brings you closer to that warm, rustic loaf fresh from your oven.
Here’s a detailed, easy-to-follow guide that even beginners can master effortlessly:
Step 1: Activate the Yeast If Using: If you’re using yeast for a lighter loaf, start by activating it. In a small bowl, combine warm water (not hot!) with honey or sugar and sprinkle the yeast over the top. Let it sit undisturbed for 5–10 minutes. You’ll notice bubbles forming and the mixture turning frothy that’s how you know your yeast is alive and ready to work.
Tip: The water should feel warm to the touch but not hot around 100–110°F (37–43°C) is ideal. If it’s too hot, it can kill the yeast.
Step 2: Combine Dry Ingredients: In a large mixing bowl, add barley flour, whole wheat flour, baking powder, and salt. Gently stir with a spoon or whisk to evenly distribute the ingredients. This ensures that your bread will have a consistent texture and flavor throughout.
Expert Note: Barley flour has less gluten, so mixing it with a little wheat flour helps the bread hold together better without becoming too dense.
Step 3: Add Wet Ingredients: Now pour in your olive oil or melted butter along with the activated yeast mixture (if using). Slowly mix everything together using a wooden spoon or your hands. As you mix, the ingredients will start to clump together, forming a soft, shaggy dough.
Pro Tip: If the dough feels too dry, add 1 tablespoon of warm water at a time until it comes together. If it feels sticky, dust it lightly with more flour.
Step 4: Knead the Dough: Transfer the dough onto a clean, lightly floured surface. Begin kneading by pressing it forward with the heel of your hand, folding it over, and repeating the motion. Knead continuously for 8–10 minutes until the dough feels soft, smooth, and elastic.
Why kneading matters: Since barley flour doesn’t form as much gluten, proper kneading helps build structure and improves texture. It’s what makes your bread chewy yet tender.Kneading is also therapeutic take your time, enjoy the rhythm, and imagine the rustic aroma of your soon-to-be baked loaf!
Step 5: First Rise (Proofing the Dough): Once kneaded, shape the dough into a round ball and place it in a lightly greased bowl. Cover it with a clean kitchen towel or plastic wrap to keep the moisture in. Leave it in a warm, draft-free place for about 1 hour, or until it doubles in size.
Tip: If your kitchen is cool, place the bowl near a slightly warm oven or wrap it with a thick cloth to speed up the rising process.
This stage allows the yeast to work its magic, developing the flavor and making the bread airy.
Step 6: Shape the Dough: After the first rise, gently punch down the dough to release excess air. Turn it out onto your countertop and shape it into a loaf. You can keep it oval for a rustic look or place it into a greased loaf pan for a classic bakery-style appearance.
Optional: Sprinkle some oats or barley flakes on top before baking for a beautiful artisanal touch.
Step 7: Second Rise (Final Proof): Cover the shaped dough again and let it rise for another 30–40 minutes. This second rise gives the bread its final volume and ensures a soft interior. You’ll know it’s ready when the dough has puffed up and springs back slightly when touched.
Step 8: Bake the Bread: Preheat your oven to 375°F (190°C) about 15 minutes before baking. Carefully place your loaf pan in the center rack and bake for 30–35 minutes, or until the top turns a beautiful golden brown.
You’ll know it’s done when:
- The crust looks firm and crisp.
- It sounds hollow when you tap the bottom of the loaf.
- Your kitchen smells absolutely heavenly!
Baker’s Tip: For an extra crusty texture, place a small oven-safe bowl of water on the lower rack while baking. The steam will create a lovely, crisp crust.
Step 9: Cooling the Bread: Once baked, remove the loaf from the oven and let it rest in the pan for 5 minutes. Then carefully transfer it to a cooling rack. Allow it to cool completely before slicing — this step is crucial! Cutting too early can make the bread gummy inside.
Tip: The waiting might feel hard, but letting it cool enhances flavor and texture. Once cooled, slice with a sharp bread knife to enjoy perfect slices.
Final Note: Baking this bread is a little journey in itself from mixing and kneading to waiting and finally slicing that warm loaf. Every moment adds to the experience. The result? A nutritious, aromatic barley bread that pairs beautifully with soups, butter, or even honey.
Once you make it yourself, you’ll realize how comforting homemade bread can be — and you might never go back to store-bought loaves again!
Preparation, Baking & Serving Details
- Prep Time: 15 minutes
- Resting Time: 1 hour 30 minutes
- Baking Time: 35 minutes
- Total Time: Approximately 2 hours 20 minutes
- Servings: 1 medium loaf (8–10 slices)
Nutritional Breakdown of Barley Bread
A single slice of barley bread (about 50g) provides approximately:
- Calories: 120
- Carbohydrates: 22g
- Protein: 4g
- Fiber: 3g
- Fat: 2g
- Iron: 6% of daily value
- Magnesium: 8% of daily value
This bread is rich in dietary fiber, supports digestion, and helps maintain energy levels throughout the day.
Best Ways to Serve Barley Bread
Barley bread can be enjoyed in many ways:
- Toast it and spread with butter or jam for breakfast.
- Serve it alongside soups and stews for a hearty meal.
- Use it as a sandwich base for a nutty, wholesome flavor.
- Pair with olive oil and herbs for a Mediterranean touch.
It’s versatile and pairs beautifully with both sweet and savory dishes.
Health Benefits of Barley Bread
Barley is packed with dietary fiber, which promotes gut health and keeps you feeling full longer. It helps regulate blood sugar levels and supports heart health.The magnesium and selenium in barley also aid metabolism and boost immunity.
So, if you’re wondering “Is barley bread healthier?”the answer is yes. It’s an excellent alternative to refined bread, offering both nutrition and taste in every bite.
FAQs
1. Why isn’t barley used for bread as often as wheat?
Because barley lacks gluten, it doesn’t rise as much as wheat flour. That’s why bakers often mix it with other flours.
2. Can you make bread with only barley flour?
Yes, but the bread will be denser and more crumbly. Mixing it with wheat flour improves texture.
3. Is barley bread gluten-free?
No, barley contains gluten, though less than wheat. It’s not suitable for celiac diets.
4. What does barley bread taste like?
It has a mild, nutty, and earthy flavor that’s different from typical white bread.
5. How can I make an old-fashioned barley bread recipe?
Use stone-ground barley flour, natural sweeteners like honey, and bake it in a traditional clay or cast-iron pan for that rustic touch.
Final Thoughts on the Barley Bread Recipe
The barley bread recipe is more than just a loaf it’s a wholesome tradition that connects us with centuries of healthy eating. Baking it at home gives you complete control over ingredients, flavor, and freshness. With its earthy aroma, dense texture, and nutritional benefits, barley bread is a rewarding addition to any kitchen.
Try it once, and you’ll see why it deserves a place in your recipe collection.
Easy Barley Bread Recipe | Healthy & Homemade Loaf
Course: Dinner, LunchCuisine: AmericanDifficulty: Easy8–10 slices
servings15
minutes2
hours20
minutes120 kcal
kcalTry barley bread recipe with a nutty flavor, crispy crust, and rich nutrition. Easy, healthy, and perfect for beginners. Step-by-step guide.
Ingredients
2 cups barley flour
1 cup whole wheat flour
1 tsp baking powder
1 tsp salt
1 tbsp honey or sugar (optional for sweetness)
1 cup warm water or milk
2 tbsp olive oil or melted butter
1 tsp active dry yeast (if you prefer a lighter texture)
Directions
- Activate the Yeast If Using: If you’re using yeast for a lighter loaf, start by activating it. In a small bowl, combine warm water (not hot!) with honey or sugar and sprinkle the yeast over the top. Let it sit undisturbed for 5–10 minutes. You’ll notice bubbles forming and the mixture turning frothy that’s how you know your yeast is alive and ready to work.
Tip: The water should feel warm to the touch but not hot around 100–110°F (37–43°C) is ideal. If it’s too hot, it can kill the yeast. - Combine Dry Ingredients: In a large mixing bowl, add barley flour, whole wheat flour, baking powder, and salt. Gently stir with a spoon or whisk to evenly distribute the ingredients. This ensures that your bread will have a consistent texture and flavor throughout.
Expert Note: Barley flour has less gluten, so mixing it with a little wheat flour helps the bread hold together better without becoming too dense. - Add Wet Ingredients
Now pour in your olive oil or melted butter along with the activated yeast mixture (if using). Slowly mix everything together using a wooden spoon or your hands. As you mix, the ingredients will start to clump together, forming a soft, shaggy dough.
Pro Tip: If the dough feels too dry, add 1 tablespoon of warm water at a time until it comes together. If it feels sticky, dust it lightly with more flour. - Knead the Dough
Transfer the dough onto a clean, lightly floured surface. Begin kneading by pressing it forward with the heel of your hand, folding it over, and repeating the motion. Knead continuously for 8–10 minutes until the dough feels soft, smooth, and elastic.
Why kneading matters: Since barley flour doesn’t form as much gluten, proper kneading helps build structure and improves texture. It’s what makes your bread chewy yet tender.
Kneading is also therapeutic take your time, enjoy the rhythm, and imagine the rustic aroma of your soon-to-be baked loaf! - First Rise (Proofing the Dough)
Once kneaded, shape the dough into a round ball and place it in a lightly greased bowl. Cover it with a clean kitchen towel or plastic wrap to keep the moisture in. Leave it in a warm, draft-free place for about 1 hour, or until it doubles in size.
Tip: If your kitchen is cool, place the bowl near a slightly warm oven or wrap it with a thick cloth to speed up the rising process.
This stage allows the yeast to work its magic, developing the flavor and making the bread airy. - Shape the Dough
After the first rise, gently punch down the dough to release excess air. Turn it out onto your countertop and shape it into a loaf. You can keep it oval for a rustic look or place it into a greased loaf pan for a classic bakery-style appearance.
Optional: Sprinkle some oats or barley flakes on top before baking for a beautiful artisanal touch. - Second Rise (Final Proof)
Cover the shaped dough again and let it rise for another 30–40 minutes. This second rise gives the bread its final volume and ensures a soft interior. You’ll know it’s ready when the dough has puffed up and springs back slightly when touched. - Bake the Bread Preheat your oven to 375°F (190°C) about 15 minutes before baking. Carefully place your loaf pan in the center rack and bake for 30–35 minutes, or until the top turns a beautiful golden brown.
You’ll know it’s done when:
The crust looks firm and crisp.
It sounds hollow when you tap the bottom of the loaf.
Your kitchen smells absolutely heavenly!
Baker’s Tip: For an extra crusty texture, place a small oven-safe bowl of water on the lower rack while baking. The steam will create a lovely, crisp crust. - Cooling the Bread
Once baked, remove the loaf from the oven and let it rest in the pan for 5 minutes. Then carefully transfer it to a cooling rack. Allow it to cool completely before slicing this step is crucial! Cutting too early can make the bread gummy inside.
Tip: The waiting might feel hard, but letting it cool enhances flavor and texture. Once cooled, slice with a sharp bread knife to enjoy perfect slices.
Notes
- For a lighter texture, replace ¼ cup barley flour with wheat flour.
- Always preheat your oven for consistent results.
- Add nuts or seeds for extra crunch and nutrition.
- Store the bread in an airtight container to keep it fresh for 3–4 days.
- Reheat slices in the toaster before serving for a freshly baked taste.